Looking to transform your data in R? Transposing your matrix or dataframe can be the key to unlocking new insights from your data. But how do you transpose in R?
In this tutorial, we will cover everything you need to know about transposing data in R, including creating a matrix and dataframe, and then transposing them with just a few lines of code. You will learn which function is used to create a transpose of a given matrix and how to transpose a matrix and a dataframe. By the end of this tutorial, you will know to quickly transform your data in R and unlock its full potential. Let’s get started!
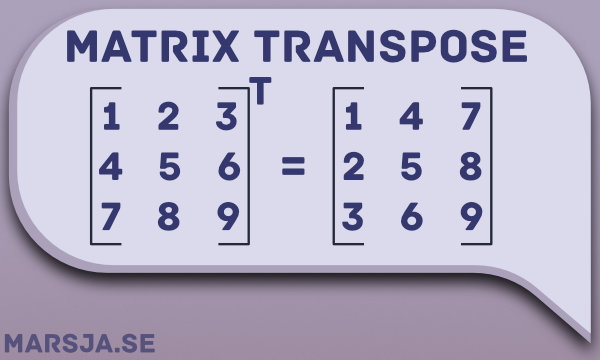
Table of Contents
- Outline
- Create a Matrix in R
- How to Transpose a Matrix in R
- Create a Dataframe in R
- How to Transpose a Dataframe in R
- Conclusion: Transposing a Matrix or a Dataframe in R
- Resources
Outline
The outline of the post is a guide to creating and transposing matrices and data frames in R. It begins by introducing matrix transposition and the function used for it in R. Next, the post provides step-by-step instructions on how to transpose a matrix in R, including creating a matrix and the code required for transposing it. The post then explains how to transpose data in R, with instructions on creating a data frame and the code necessary for transposing it. Additionally, the post covers creating a data frame in R and provides instructions on transposing it. Finally, the post concludes by summarizing the key takeaways and emphasizing the importance of understanding matrix and data frame transposition in R for data analysis and manipulation. Overall, the post is a concise and informative guide that provides clear and practical instructions for those looking to learn how to transpose matrices and data frames in R.
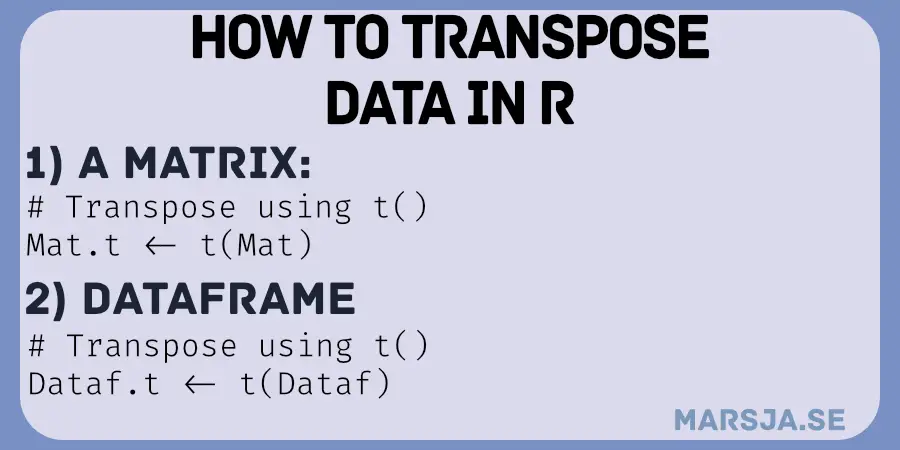
To interchange rows with columns, you can use the t() function. For example, if you have the matrix (or dataframe) mat you can transpose it by typing <t(mat). As previously hinted, this will result in a new matrix obtained by exchanging the rows and columns.
The easiest way to transpose a matrix in R is to use the t() function. As previously mentioned, you can use t(YourMatrix) to get the transpose of your matrix “YourMatrix”.
Transposing data, e.g., in a data frame or matrix, is easy to do with the t() function. For example, if you want to transpose a data frame you can type t(dataFrame).
For learning more about useful functions and operators, see, for example, the post about how to use %in% in R. First, before transposing a matrix, we will create a matrix that we can practice on.
Create a Matrix in R
In this section, we are going to create the matrix that we later are going to transpose. Here we are going to use the matrix() function:
# Creating a matrix:
mat <- matrix(1:15, ncol = 5)Code language: R (r)
In the code chunk above, we create the variable mat and assign it to a matrix. The matrix is generated using the matrix() function in R. We pass the values 1 to 15 as the first argument to the function, indicating the elements of the matrix in row-major order. We set the second argument “ncol to 5, specifying the number of columns in the matrix.
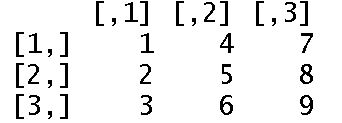
As a result, the matrix mat is a 3 by 5 matrix, containing the integers from 1 to 15 in row-major order. The first row of the matrix consists of the numbers 1 to 5, the second row contains the numbers 6 to 10, and the third row contains the numbers 11 to 15. Here is the result:
Note, in the example above, we created a sequence of numbers in R using the : operator. In the next section, we will learn how to transpose the matrix we just created. Learn more here:
How to Transpose a Matrix in R
Here’s how to transpose a matrix in R with the t() function:
# Transpose matrix:
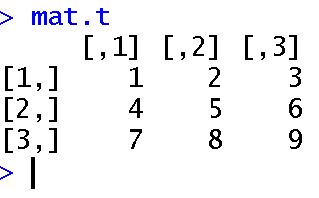
mat.t <- t(mat)Code language: CSS (css)In the code chunk above, we create a new variable called mat.t using the transpose function in R. To transpose a matrix in R, we used the t() function, which flips the rows and columns of the original matrix. In this case, the original matrix mat is transposed, so the columns become rows, and the rows become columns.
By applying the transpose function to the original matrix mat, we created the new matrix mat.t that has the same elements as mat but with the rows and columns switched. This means that mat.t is a 5 by 3 matrix, with the same elements as mat but arranged differently.
In the image below, you can see that we now have a transposed matrix. That is, we now have a matrix in which we have rotated the rows and columns. This results that the rows become columns and the columns now are rows:
As previously mentioned, using this function (i.e., transpose) will also created a new matrix object. We can see this by using the class() function:
class(mat.t)
# [1] "matrix" "array" Code language: CSS (css)
In the next section, we will create a dataframe and, in the following section, we will use the t() function to rotate the dataframe, as well.
Create a Dataframe in R
In this section, we are going to use the functions data.frame() and matrix() to create a dataframe:
# Creating a dataframe
dataf <- data.frame(matrix(1:15, ncol = 5))
# Setting the column and row names
colnames(dataf) <- c('A', 'B' ,'C', 'D', 'E')
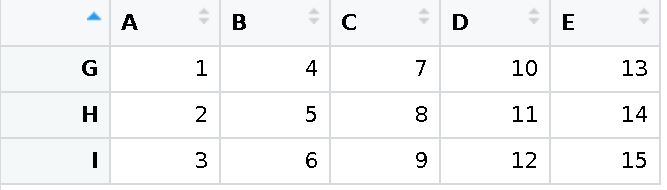
rownames(dataf) <- c('G', 'H','I')Code language: PHP (php)Additionally, we set the column names as “A”, “B”, “C”, “D,” and “E” using the colnames() function. Additionally, we set the row names as “E”, “D”, and “F” using the rownames() function. Now, we have a small dataframe that we can rotate!
Naturally, dataframes can be created in many other ways. More common ways are to read data from a file stored on your hard drive. See the following blog posts to learn more:
- How to Read & Write SPSS Files in R Statistical Environment
- R Excel Tutorial: How to Read and Write xlsx files in R
- How to Read and Write Stata (.dta) Files in R with Haven
Now that we have a dataframe we can make the rows of the column in this dataframe. That is, let’s move to the next section of this tutorial.
How to Transpose a Dataframe in R
To transpose a dataframe in R, we can apply the same method as we did with the matrix earlier. That is, we rotate the dataframe with the t() function. Here’s how to rotate a dataframe:
# transpose a dataframe
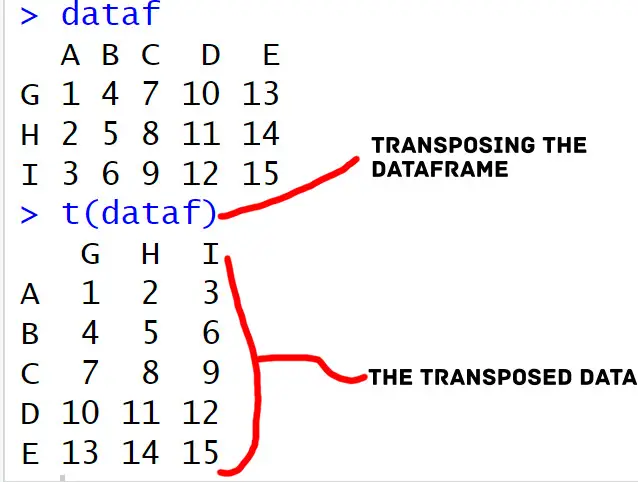
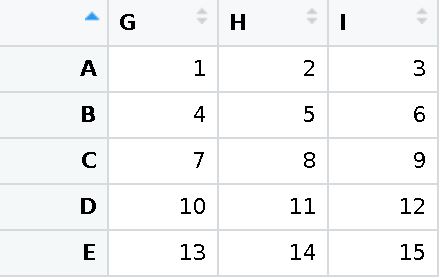
t(dataf)Code language: PHP (php)Here’s the resulting transposed dataframe. Notice how the row names now are the column names:
Note, if your dataframe contains categorical data and you need to change the name of these you can use R to rename the levels of a factor. If we, on the other hand, have an array we cannot rotate it. Here’s what happens if we try:
t(x)
x <- array(rep(1, 12*4*2), dim=c(12, 4, 2))
# Error in t.default(x) : argument is not a matrixCode language: PHP (php)
Now, there are many other tasks that you might find yourself in need of doing. For example, if you need to drop variables from your dataframe you can use dplyr to remove columns. Additionally, you can also extract year from datetime in R or create dummy variable in r
Conclusion: Transposing a Matrix or a Dataframe in R
In this post, we have covered the topic of matrix and data frame transposition in R. We began by introducing the concept of matrix transposition and the function used to achieve it in R. We then provided step-by-step instructions for transposing a matrix in R, including creating a matrix using the matrix() function and transposing it using the t() function. Additionally, we explained how to transpose data in R by creating a data frame and using the t() function to transpose it.
Furthermore, we discussed how to create a dataframe in R using the data.frame() function and provided instructions on transposing it. Understanding matrix and data frame transposition is crucial for data manipulation and analysis tasks, and this post has provided clear and practical instructions for achieving this in R.
If you found this post helpful, we encourage you to share it with others who may benefit. Also, if you have any questions or comments, please leave them below. We appreciate your engagement and feedback!
Resources
Here are some more R tutorials that you may find useful:
- How to Rename Column (or Columns) in R with dplyr
- Countif function in R with Base and dplyr
- How to Convert a List to a Dataframe in R – dplyr
- How to Calculate Five-Number Summary Statistics in R
- R Count the Number of Occurrences in a Column using dplyr
- How to Rename Column (or Columns) in R with dplyr
- Wide to Long in R using the pivot_longer & melt functions
- How to Rename Factor Levels in R using levels() and dplyr