This short Python tutorial will teach us how to turn the code from blog posts to Jupyter notebooks. Specifically, we will learn how to convert HTML to Jupyter Notebooks (.ipynb).
In this post, we will use the Python packages BeautifulSoup4, json, and urllib. We will use these packages to scrape the code from webpages, putting their code within <code></code>.
Table of Contents
- Install the Needed Packages
- How to Convert HTML to a Jupyter Notebook (.ipynb)
- Conclusion: How to Convert HTML to Jupyter Notebooks (.ipynb)
- Resources
Note this code is not intended to steal other people’s code. I created this script to scrape my code and save it to Jupyter Notebooks because I noticed that my code sometimes did not work as intended. That is, scraping code elements from my blog posts enabled me to test my scripts in my tutorials.
Install the Needed Packages
We need to install BeautifulSoup4 before we continue converting HTML to Jupyter Notebooks. Furthermore, we need to install lxml.
How to Install Python Packages using conda
In this section, we will learn how to install the needed packages using the packages manager conda. First, open up the Anaconda Powershell Prompt
Now, we are ready to install BeautifulSoup4.
conda -c install anaconda beautifulsoup4 lxmlCode language: Bash (bash)How to Install Python Packages using Pip
It is, of course, possible to install the packages using pip as well:
pip install beautifulsoup4 lxmlCode language: Bash (bash)See the more recent post about installing packages in Python for more information. Now, when you are using pip, you might get a message that there’s a newer version available. If this is the case, upgrading is easy: learn how to upgrade pip using pip, conda, and Anaconda variable.
How to Convert HTML to a Jupyter Notebook (.ipynb)
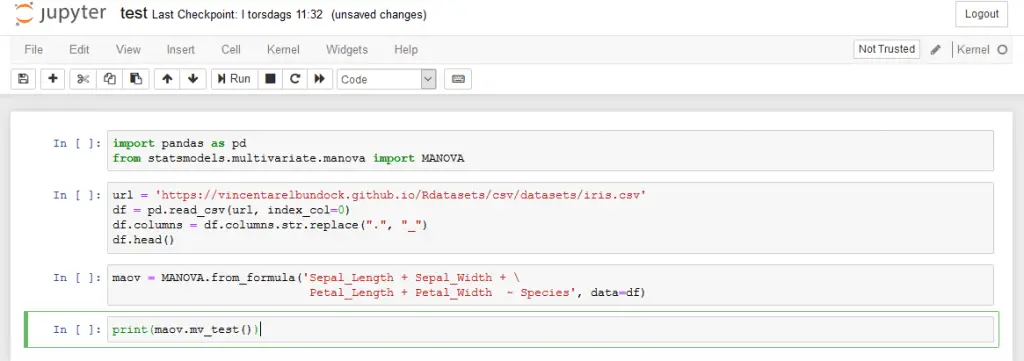
Now that we have installed the Python packages, we can continue scraping the code from a web page. In the example below, we will start by importing BeautifulSoup from bs4, json, and urllib. Next, we have the URL to the webpage that we want to convert to a Jupyter Notebook (this).
1. Import BeautifulSoup, json, & urllib
Start by importing the needed packages:
from bs4 import BeautifulSoup
import json
import urllib

url = 'https://www.marsja.se/python-manova-made-easy-using-statsmodels/'Code language: Python (python)
2. Setting a Custom User-Agent
In the next line of code, we create the dictionary headers.
headers = {'User-Agent': 'Mozilla/5.0 (X11; Linux x86_64) AppleWebKit/537.11'\
             '(KHTML, like Gecko) Chrome/23.0.1271.64 Safari/537.11',
         'Accept': 'text/html,application/xhtml+xml,application/xml;q=0.9,*/*;q=0.8',
         'Accept-Charset': 'ISO-8859-1,utf-8;q=0.7,*;q=0.3',
         'Accept-Encoding': 'none',
         'Accept-Language': 'en-US,en;q=0.8',
         'Connection': 'keep-alive'}Code language: Python (python)
This is because many websites (including the one you are reading now) will block web scrapers, and this will prevent that from happening. In the following code chunk, we will create a Request object. This object represents the HTTP request we are making.
3. Read the URL
In the third step, we use Request to read the URL:
req = urllib.request.Request(url,
    headers=headers)
  page = urllib.request.urlopen(req)
  text = page.read()Code language: Python (python)
In the code chunk above, we created a Request object that specifies the URL we want to retrieve. Furthermore, we called urlopen using the Request object. This will, in turn, make a response object for the requested URL. Finally, we used.read() on the response to get the data.
3. Use BeautifulSoup to Scrape the HTML
We are now going to use BeautifulSoup4 to make it easier to scrape the HTML:
soup = BeautifulSoup(text, 'lxml')
soupCode language: Python (python)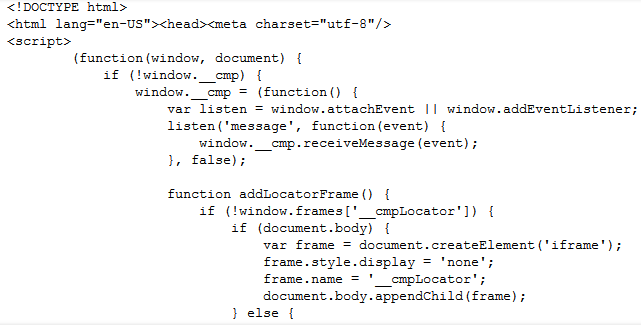
4. Create Jupyter Notebook Metadata with json
Now we are ready to convert HTML to a Jupyter Notebook (this code example inspired this code). First, we start by creating some metadata for the Jupyter notebook.
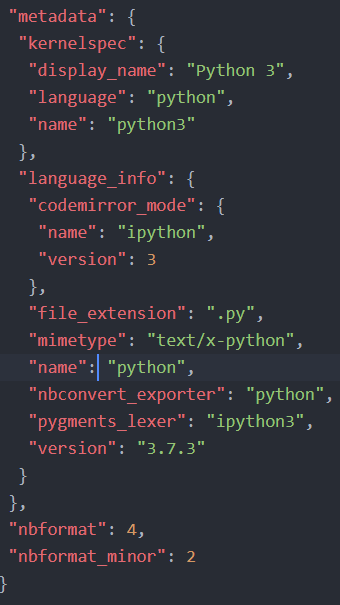
In the code below, we start by creating a dictionary to store our scraped code elements later. This will be the metadata for the Jupyter Notebook we will create. Note .ipynb are simple JSON files containing text, code, rich media output, and metadata. The metadata is not required, but here we will add what language we use (i.e., Python 3).
create_nb = {'nbformat': 4, 'nbformat_minor': 2,
              'cells': [], 'metadata':
             {"kernelspec":
              {"display_name": "Python 3",
               "language": "python", "name": "python3"
  }}}Code language: Python (python)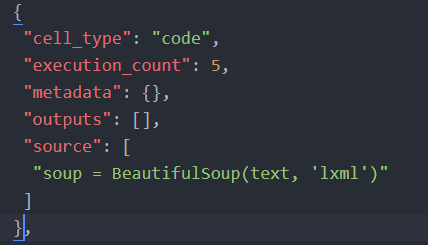
More information about the format of Jupyter Notebooks can be found here.
5. Getting the Code Elements from the HTML
In the last step, we are creating a Python function called get_code. This function will take two arguments. First, the beautifulsoup object, we earlier created, and the content_class to search for content in. In the case of this particular WordPress, blog, this will be post-content
def get_data(soup, content_class):
    for div in soup.find_all('div',
                             attrs={'class': content_class}):

        code_chunks = div.find_all('code')

        for chunk in code_chunks:
            cell_text = ' '
            cell = {}
            cell['metadata'] = {}
            cell['outputs'] = []
            cell['source'] = [chunk.get_text()]
            cell['execution_count'] = None
            cell['cell_type'] = 'code'
            create_nb['cells'].append(cell)

get_data(soup, 'post-content')

with open('Python_MANOVA.ipynb', 'w') as jynotebook:
    jynotebook.write(json.dumps(create_nb))Code language: Python (python)
Next, we are looping through all div tags in the soup object. Here, we only look for the post content. Next, we get all the code chunks searching for all code tags
In the final loop, we review each code chunk and create a new dictionary (cell) to store the code. The important part is where we add the text using the get_text method. Here, we are getting our code from the code chunk and adding it to the dictionary.
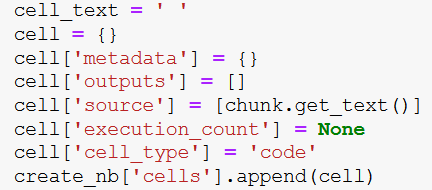
Finally, we add this to the dictionary, nb_data, which will contain the data we will save as a Jupyter notebook (i.e., the blog post we have scraped).
- More about parsing JSON in Python
Note that we get the nb_data, a dictionary from which we will create our notebook. In the final two rows of the code chunk, we will open a file (i.e., test.ipynb) and write to this file using the JSON dump method.
Here is a Jupyter notebook containing all the code above.
Conclusion: How to Convert HTML to Jupyter Notebooks (.ipynb)
This post taught us how to convert HTML pages to Jupyter Notebooks. Specifically, we used BeautifulSoup, lxml, and Python.
Resources
Here are some Python tutorials you might find helpful:
- Python Check if File is Empty: Data Integrity with OS Module
- How to Convert a Float Array to an Integer Array in Python with NumPy
- Your Guide to Reading Excel (xlsx) Files in Python
- Coefficient of Variation in Python with Pandas & NumPy