In this post, you are going to learn how to create a simple experiment using the free experiment building software OpenSesame. As I have previously written about, OpenSesame is an application based on Python for creating Psychology, Neuroscience, and Economics experiments. It offers a nice and easy-to-use interface. In this interface, you can drag and drop different objects. This means that you don’t have to know any Python programming at all to create an experiment. If you need to know how to use images as stimuli, you can see this OpenSesame Tutorial.
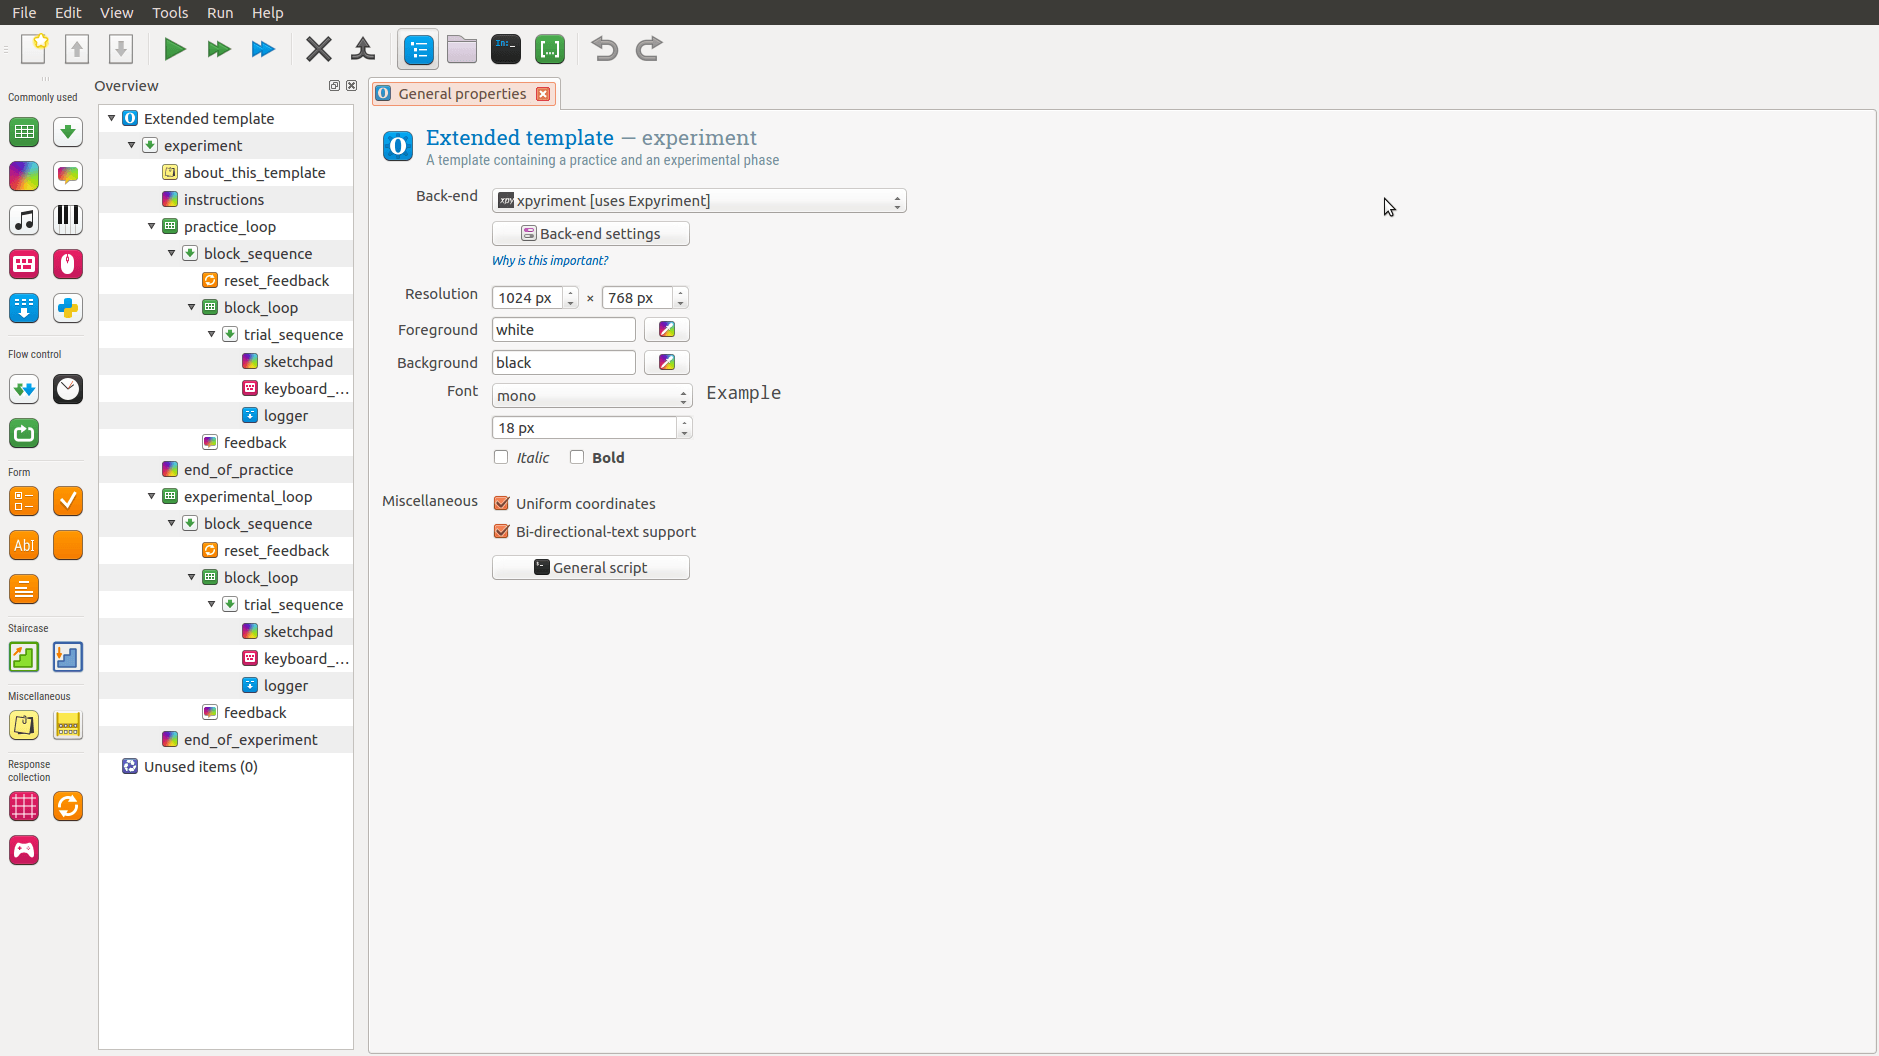
Table of Contents
Flanker Task
The task we are going to use in this OpenSesame tutorial is a version of the Flanker Task. In the version we will use here, the task is to respond, as quickly and accurately as possible, to the direction of an arrow. The arrow will be surrounded by either arrow pointing in the same direction (congruent; e.g., “<<<<<“) or in the other direction (incongruent: “>><>>”). In the example, there will be four practice trials and 128 test trials. Each trial, whether practice or test, will start with presenting a fixation cross for 2000ms. Following the fixation cross, the target and flankers will be presented (also for 2000ms). The general layout can be seen in the figure below.
Creating the Flanker Task
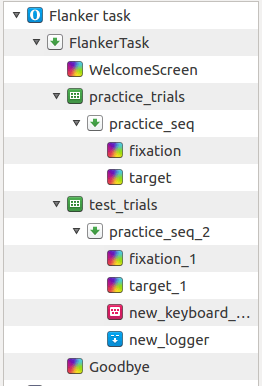
In this tutorial, we start with OpenSesame’s default template:
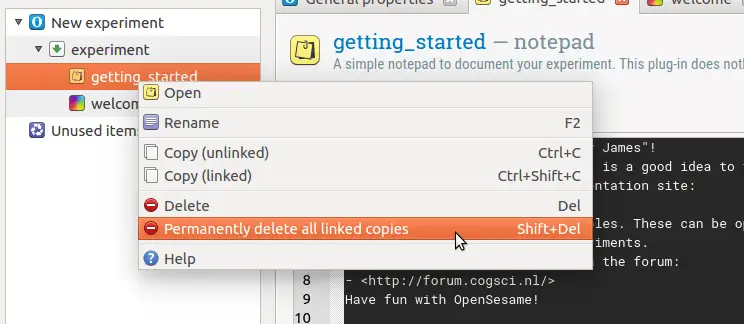
Generally, this is what OpenSesame looks like when we start it. Now we delete the getting_started by right-clicking on it and selecting “Permanently delete all linked copies”.
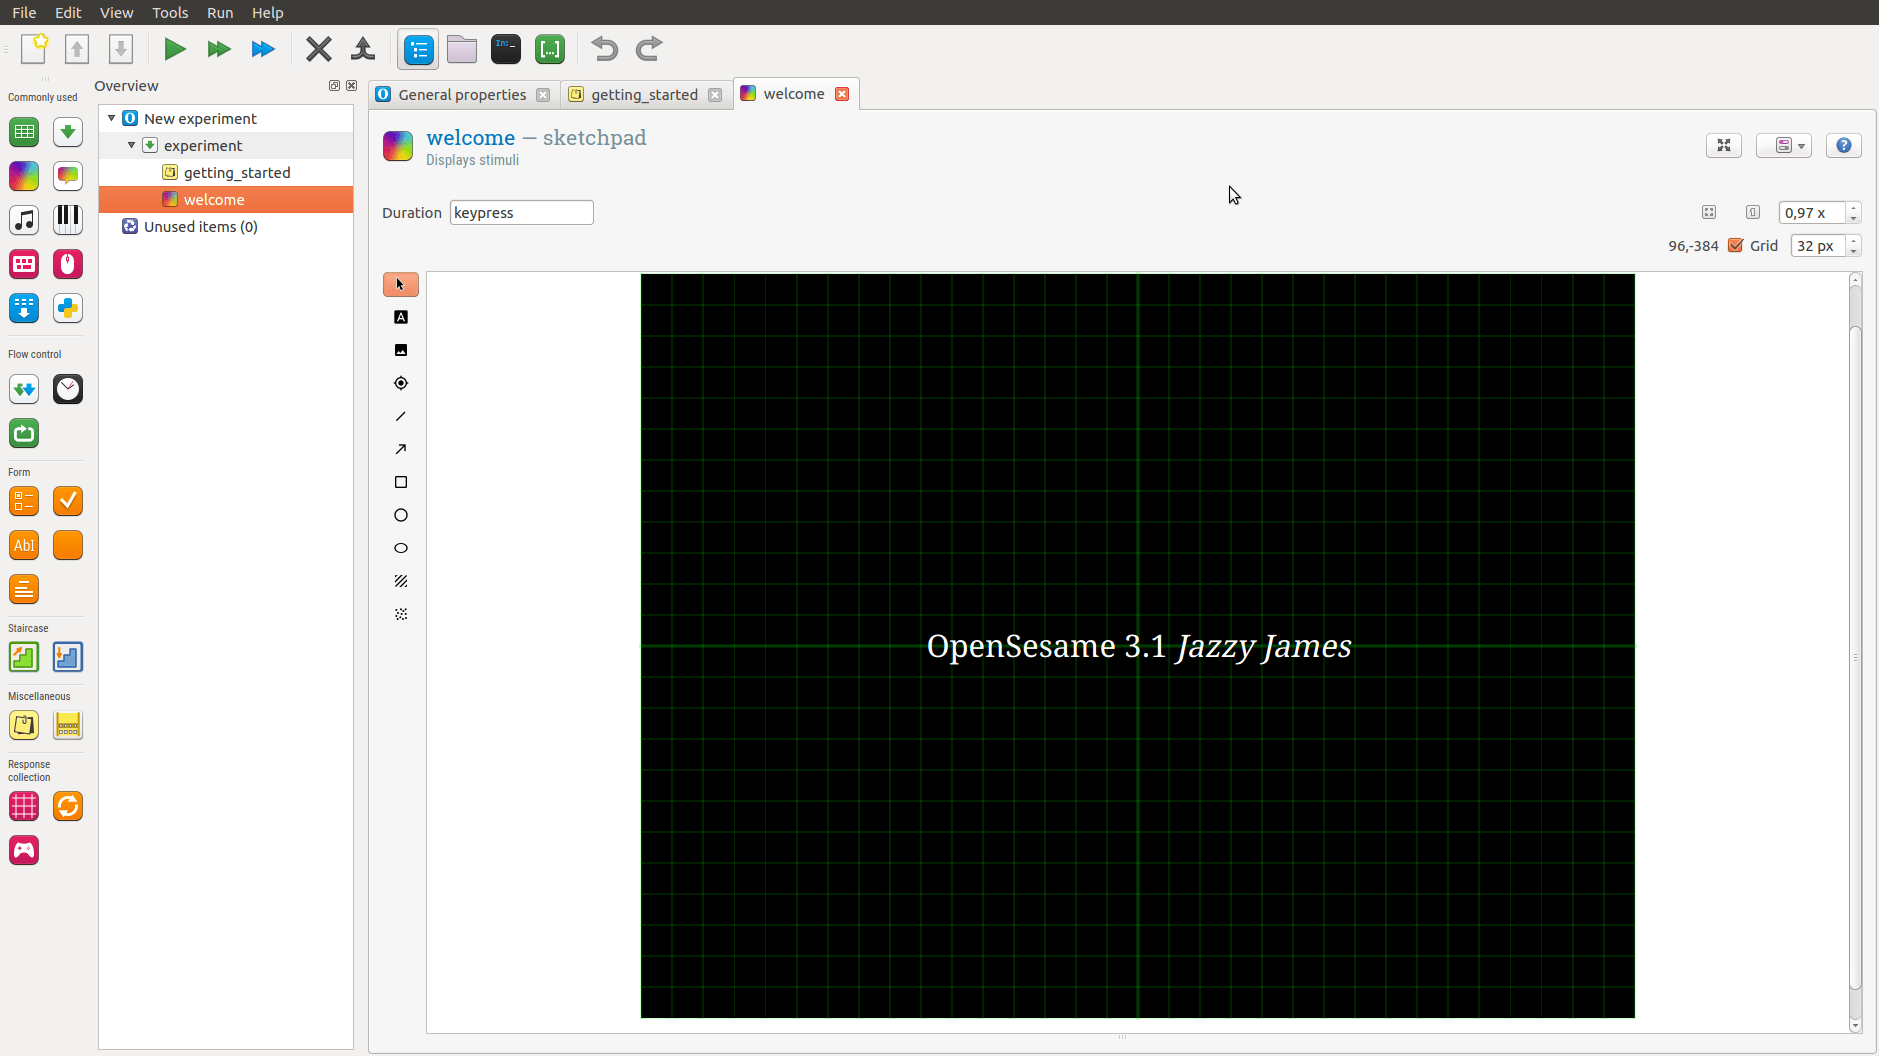
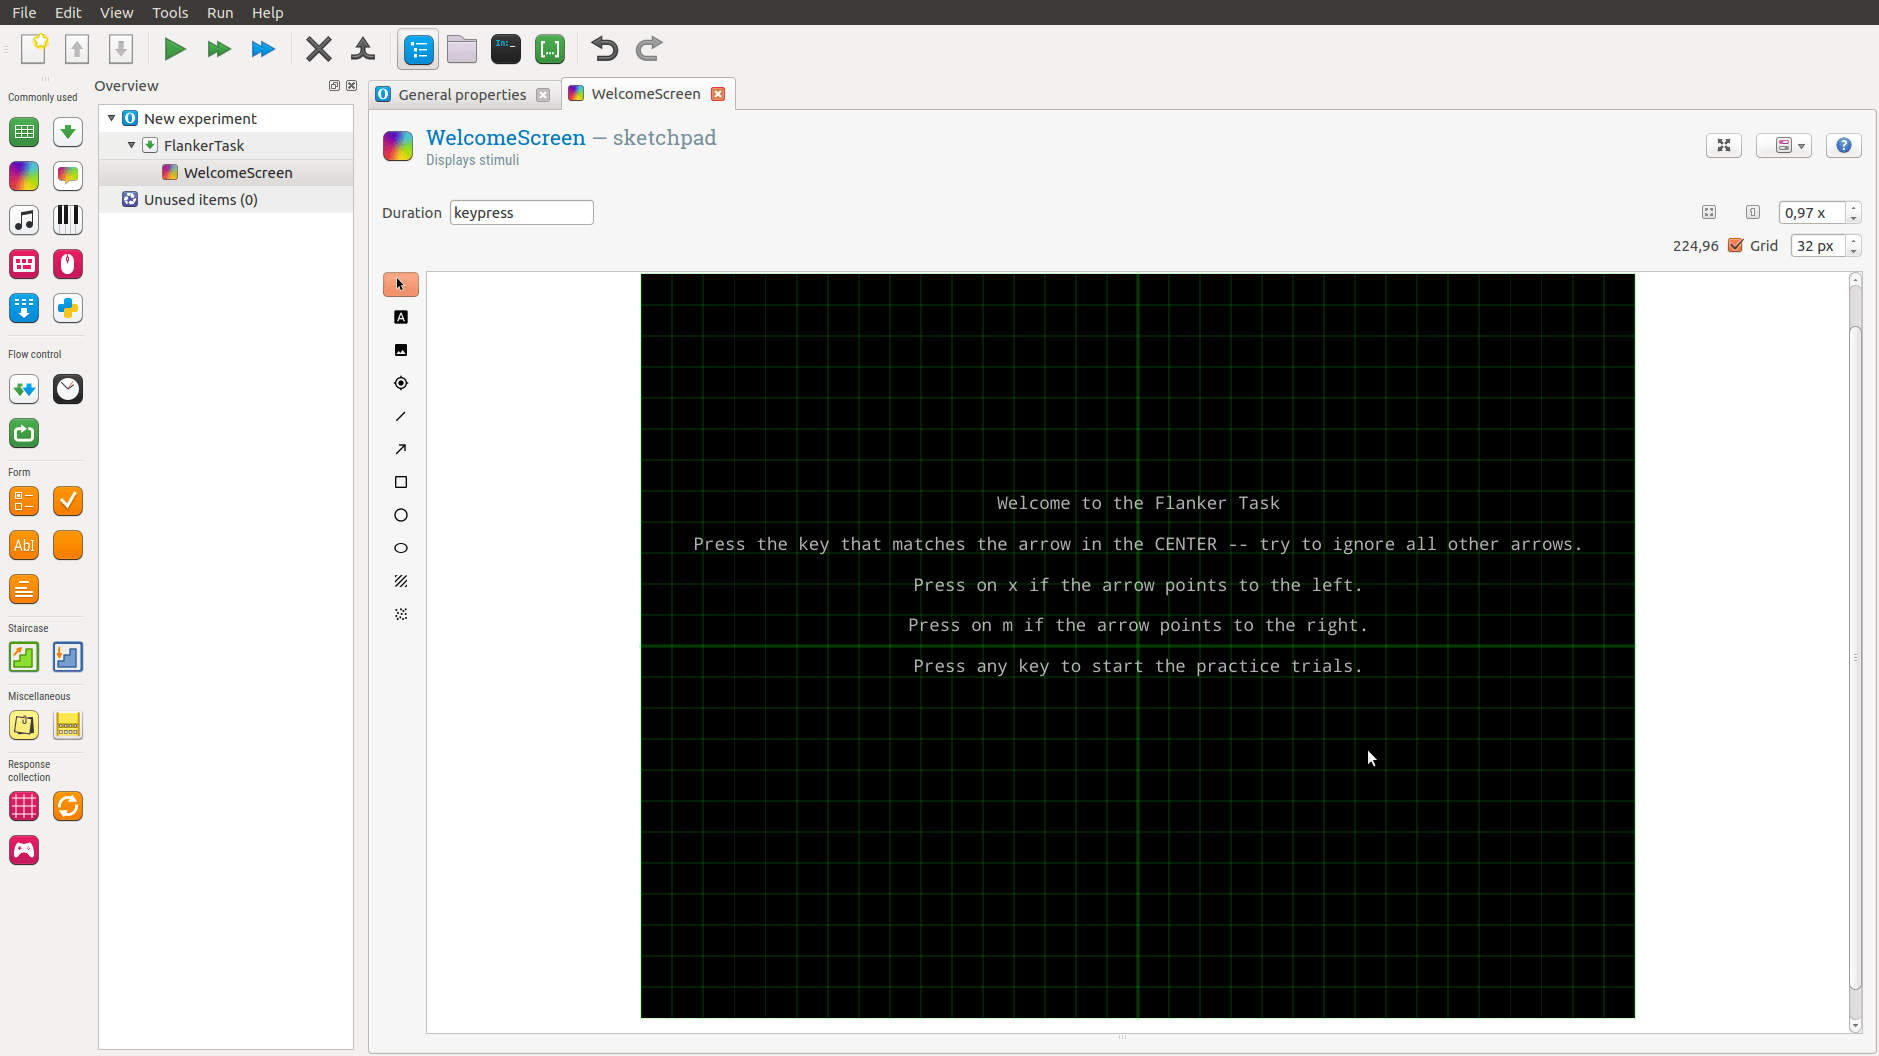
When this is done, I renamed the welcome sketchpad to “WelcomeScreen” (click on the blue text to rename it). In the “WelcomeScreen” we will add text containing the task instructions. To change the text, double-click on “OpenSesame 3.1 Jazzy James” (or whatever text your version of OpenSesame will have):
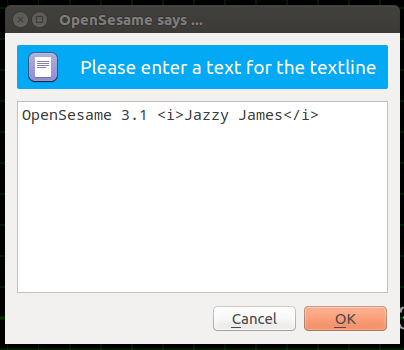
In this dialogue, we will type our welcome and task instructions, and the text in the sketchpad will change accordingly:
Creating the practice trials
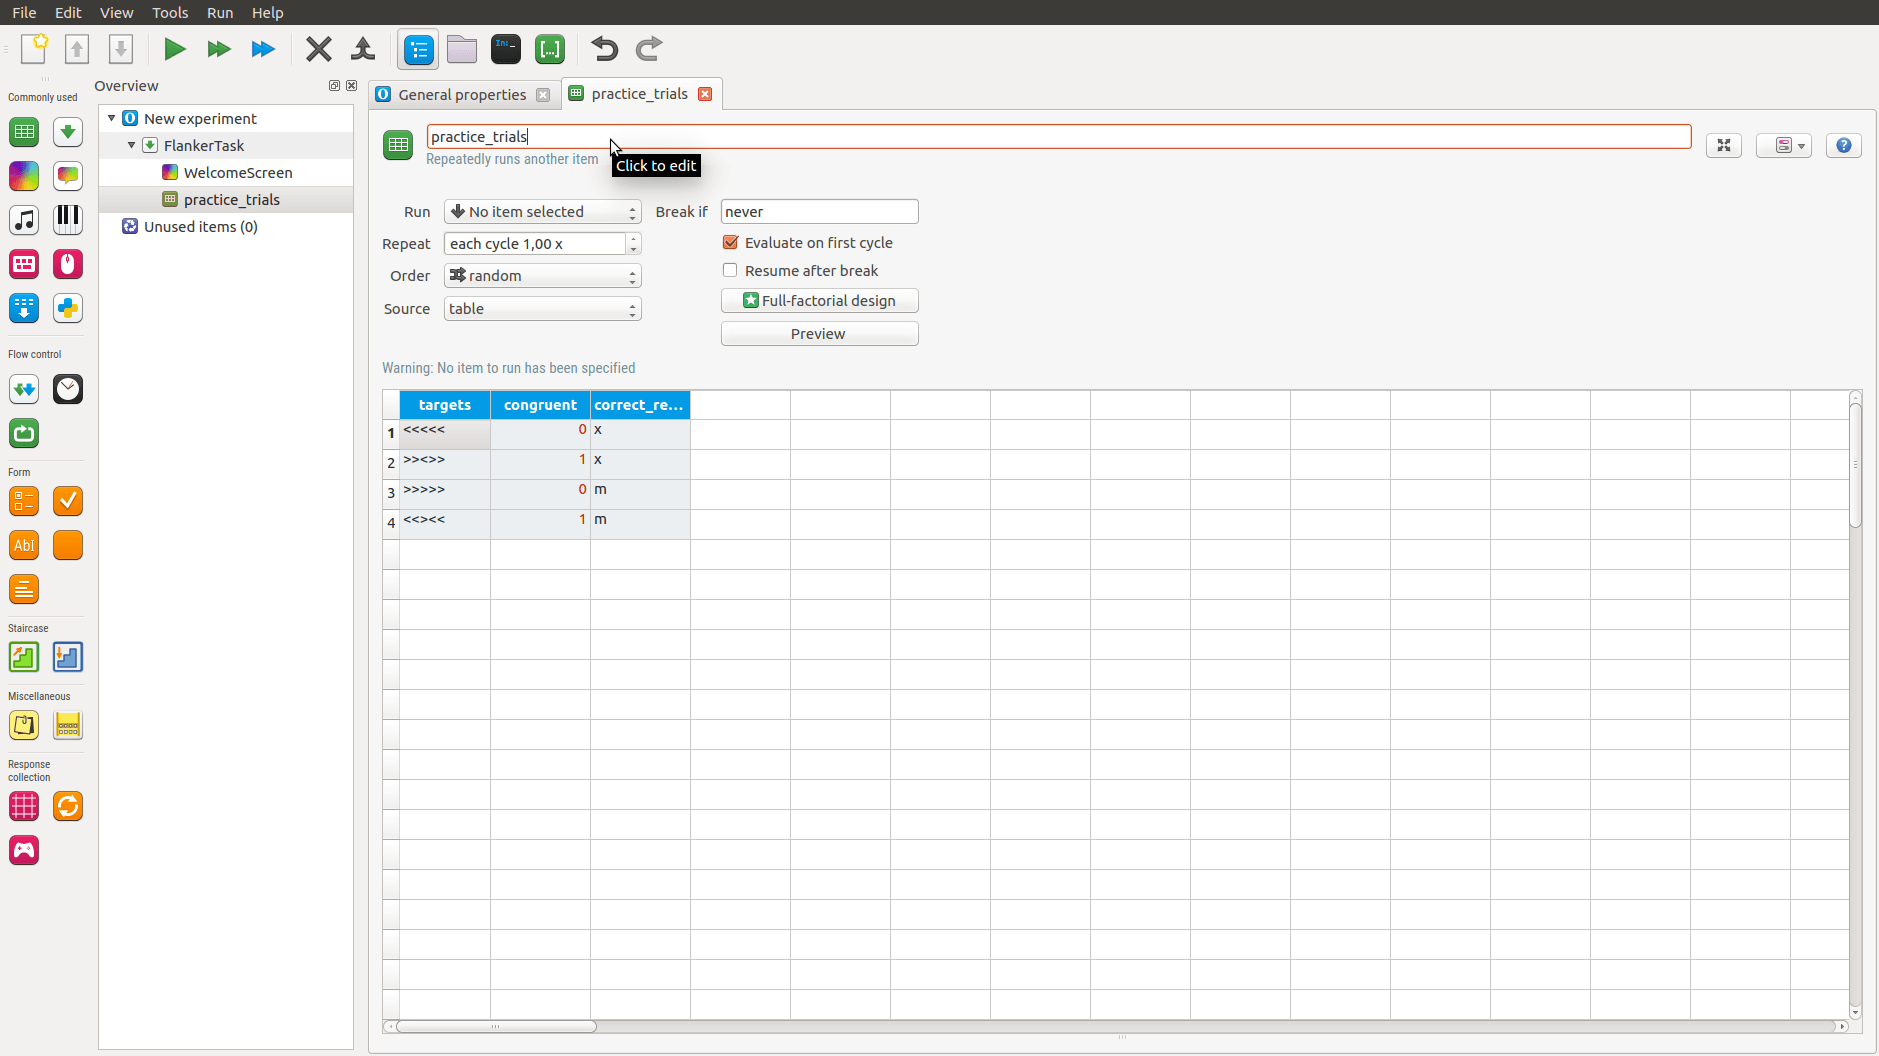
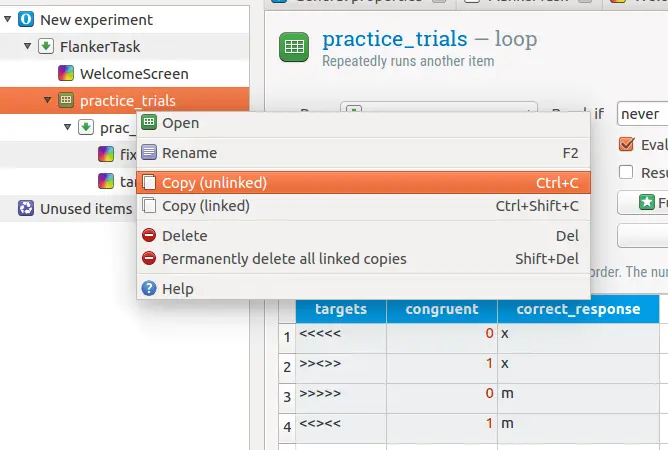
The next step is to create a loop for our practice trials by dragging and dropping the loop object under our welcome screen. We put it under our welcome screen and give it the name “practice_trials” by clicking on the new_loop (blue text). In our case, we add four trials. First, we name four columns, targets, congruent, and correct_response. In the column targets, we put the four different types of stimuli we are going to use in our example (e.g., “<<<<<“, “>><>>”, “>>>>>”, and “<<><<“) and in the column congruent we put 0 and 1 for congruent and incongruent trials, respectively. Finally, we add the correct response in the last column (“x” for pointing left and “m” for pointing right).
Inserting a sequence
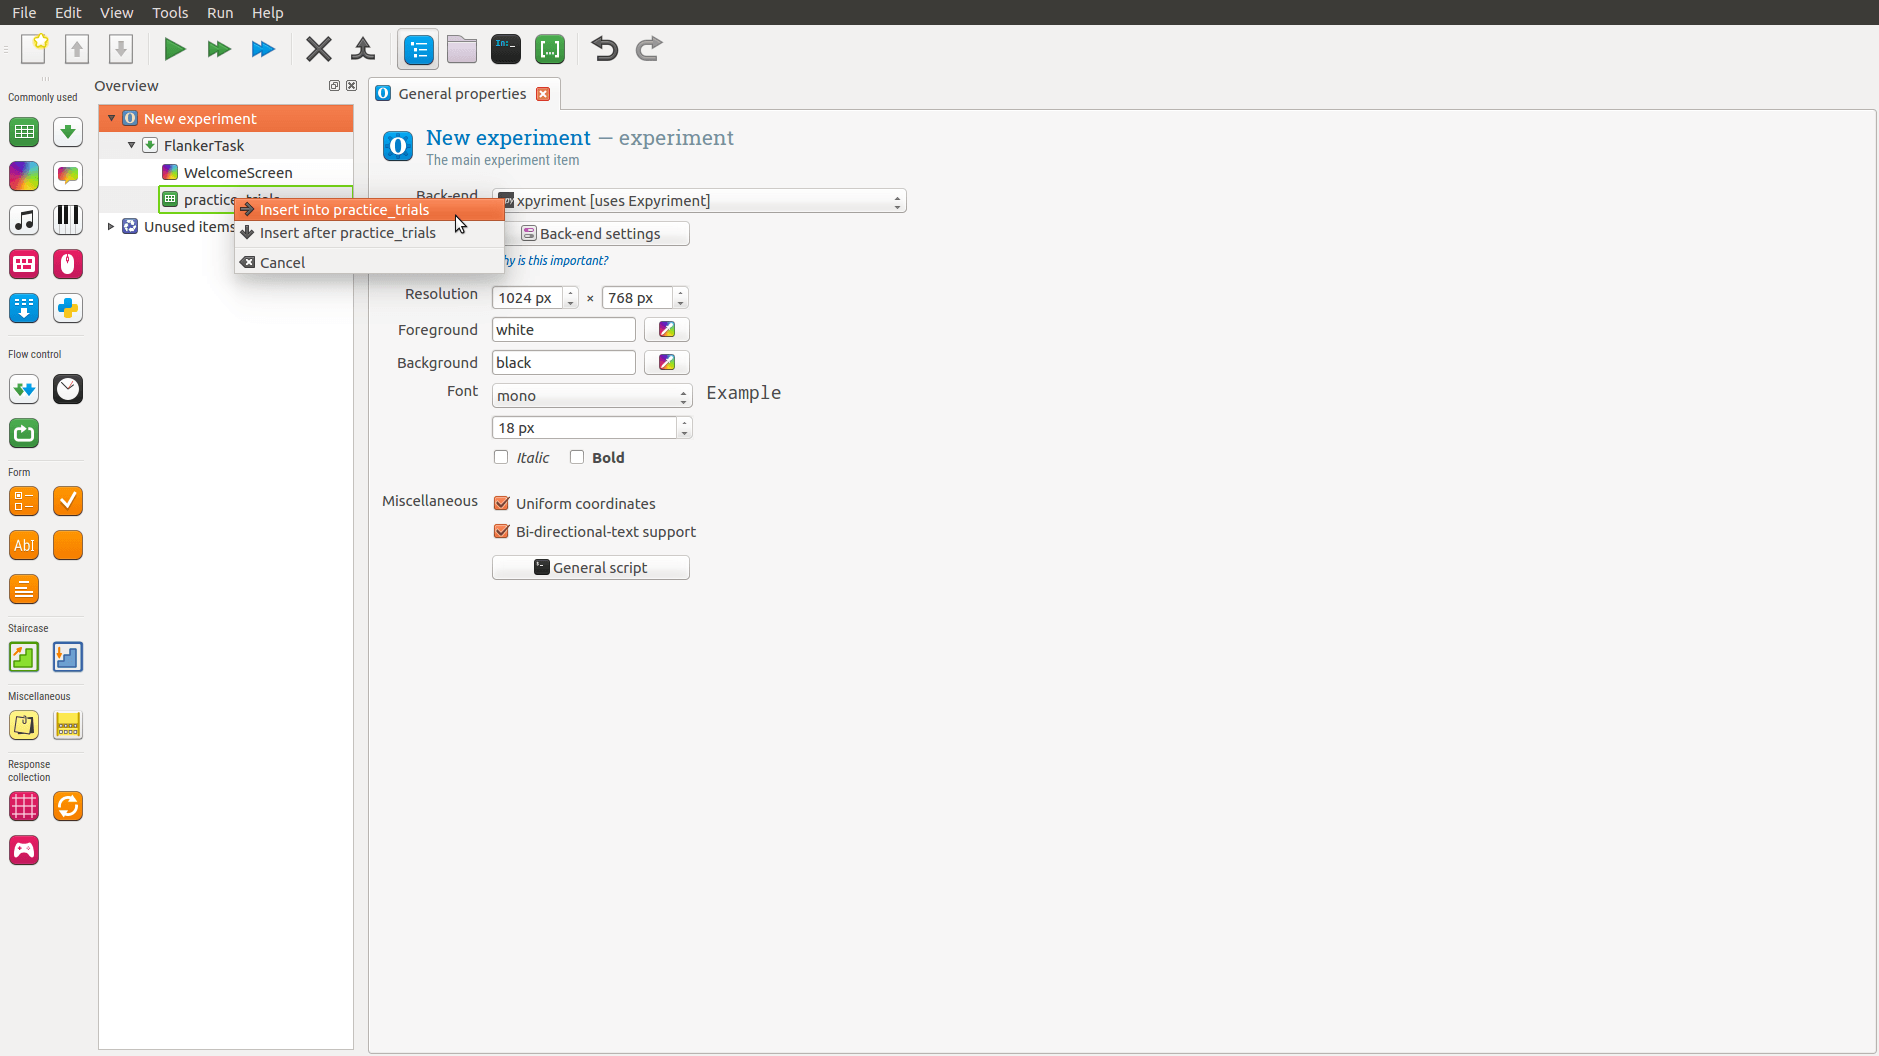
The next thing we need to do is insert a sequence into our practice_trials loop. Here we will add our fixation cross, flanker stimuli, and so on. Things that are put into the sequence item are run in the order they appear. To add the sequence item, drag and drop the item to the practice trials loop:
After we have created our sequence item, we can rename it to “practice_seq” and insert a sketchpad. Each trial is, namely, going to start with the presentation of the fixation dot followed by the flanker stimuli. A sketchpad is inserted similarly to the sequence item. We drag the sketchpad object and drop it into the practice sequence. When we have our first sketchpad, we renamed it fixation and put the duration to 2000ms:
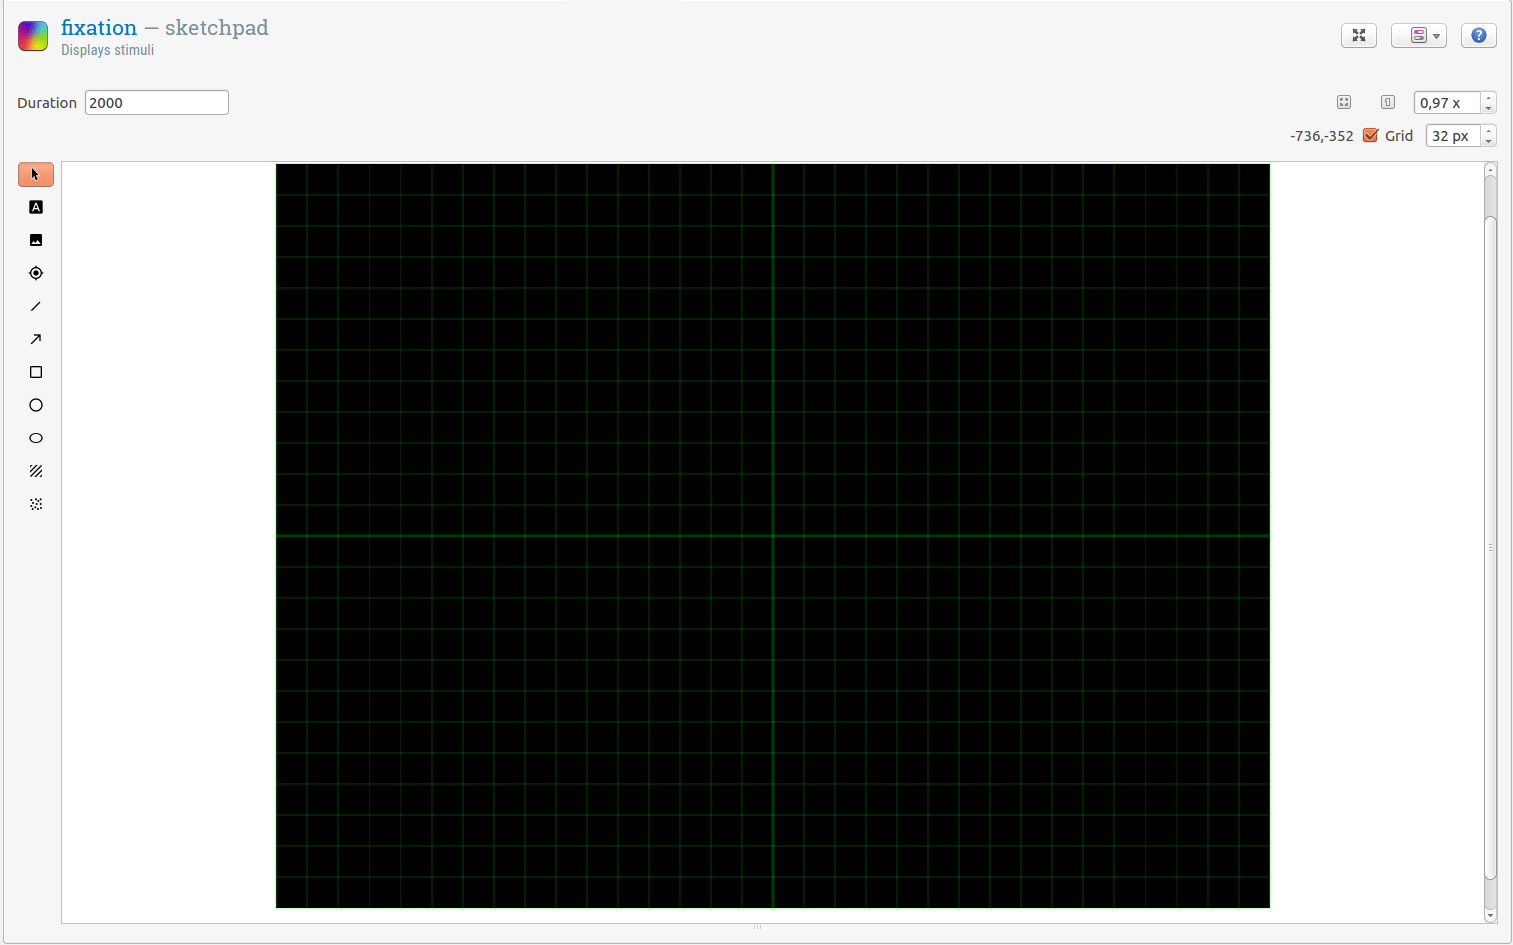
Next, we will draw the fixation dot in the middle of the sketchpad item. It is quite easy; select the icon looking like a crosshair and click in the middle of the black screen with a green grid:
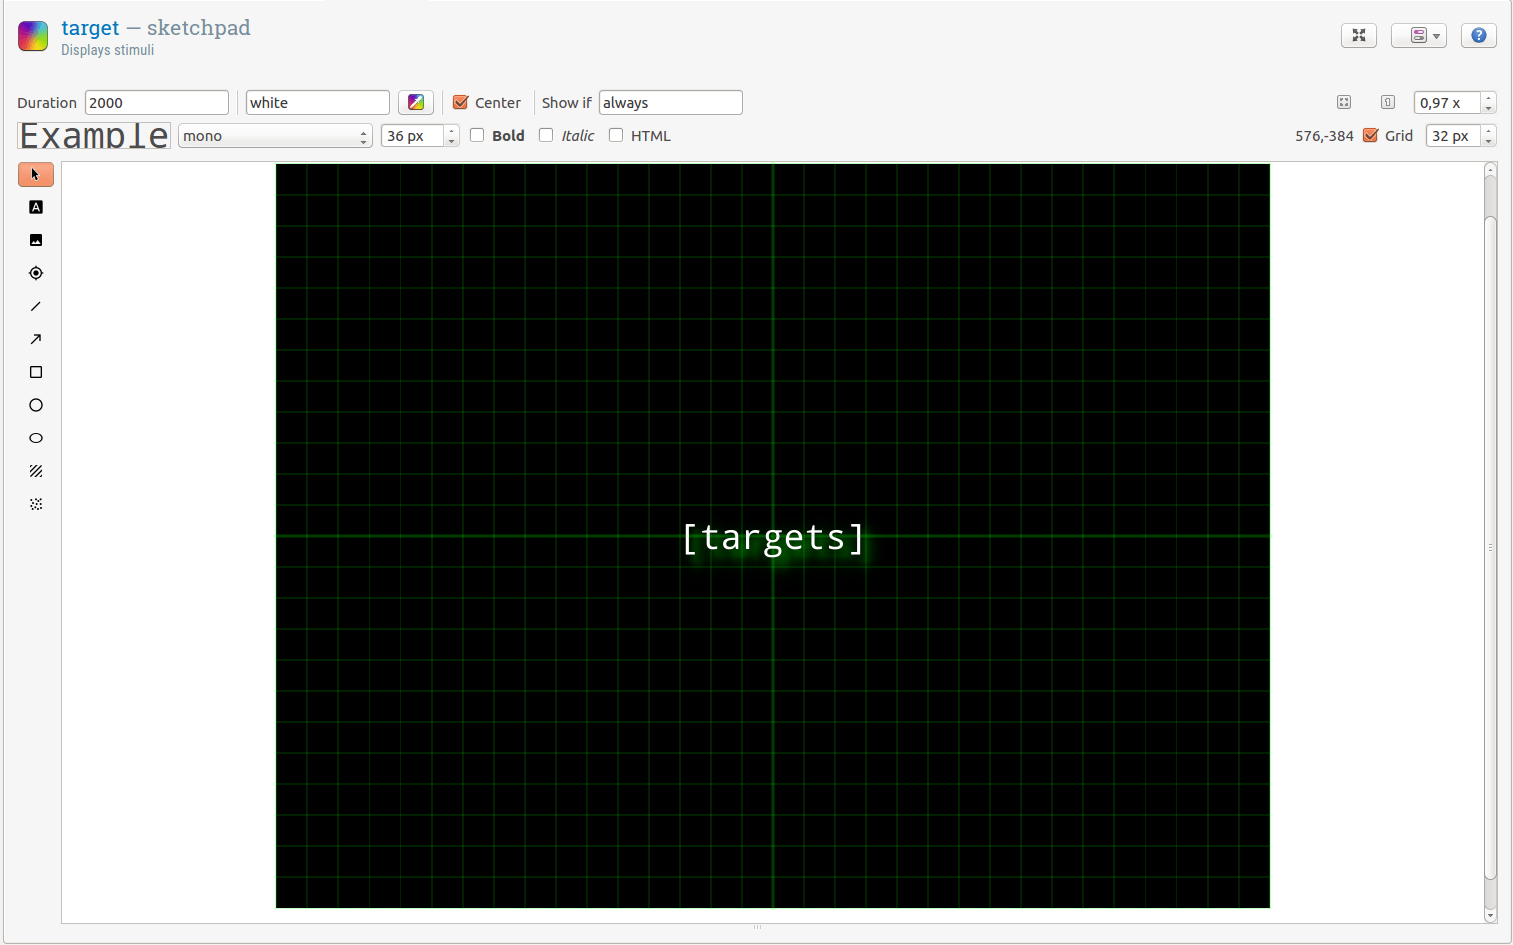
We have created our fixation dot and are ready to add a new sketchpad for presenting the Flanker stimuli. We drag and drop a sketchpad item, but on this item, we select a text line element (the icon with an “A”) and click on the middle of the screen. In the dialogue that pops up, we write “[targets]”:

It is important that we write “targets” within the brackets because this is what tells OpenSesame to get the text we wrote in the column earlier (the practice loop). As you may notice in the image below, we also set the duration to 2000ms and increased the font size (36 px). What seems to be important here is to untick HTML. Using the HTML setting, it seems like the arrows (“<“) look a bit weird, namely. Since we don’t typically use the data from practice trials, we skip how to collect responses in this OpenSesame tutorial. We will look at this when we create our test trials, however.
The last thing we do before we create our experiment trials is to add a sketchpad after the practice loop and name it “end_practice”. In this sketchpad, we add a textline object with the text: “That was the practice trials. Press ANY key to start the actual test.”
Creating the test trials
A neat thing with OpenSesame is that we can copy our practice loop by right-clicking it. This way, we can skip creating a new loop, sequence, and so on. In this case, we copy the practice loop unlinked so that we can add trials to our experiment block:
If we right-click again (or press Ctrl-V) we can choose to paste our copied loop after the practice trials (and we do that). We rename the new loop to “experiment_loop” and the new sequence to “experiment_seq”. Finally, we copy-and-paste our trials until we get 64 trials:

In the Flanker task, we will collect responses, of course. We now need to add a response device. As with all objects in OpenSesame, we can find the keyboard object to the left on the menu. We drag and drop it under the target_1 sketchpad. Here we add 1200 to Timeout because we want a response window with a duration of 1200ms. That we named one column “correct_response” means that we don’t have to add that to our keyboard:

Because we want to have some data recorded (i.e., correct responses and response time), the last thing we will add to the experiment is a logger. In this object, we just leave it so it logs everything, but we could, if we would like, just tell OpenSesame which items we want to record.
We also want to tell the subjects that the task has ended, so we add a final item to the test: the end screen. Again, this will be a sketchpad with the name “end_screen” and the text: “That was the test. Thank you for participating!”
Conclusion: Creating a Flanker Task with OpenSesame
That was the OpenSesame tutorial. Now we know how to create a Psychology experiment using the free tool OpenSesame! I compiled the how-to as a PDF: OpenSesame Tutorial- How-To Create A Psychology Experiment.pdf.