In this PsychoPy tutorial, you will learn how to create the Psychomotor Vigilance Task (PVT) using some but not that much coding. However, as the setup for this test has a random interstimulus interval (ISI), we will create a Psychomotor Vigilance Test with a duration that we want, and we will present feedback; we will have to use some custom Python code as well. In the next section of this Psychopy tutorial, you will find information on 1) what you need to follow the tutorial and 2) an overview o the contents of this post. If you only want to download the Psychomotor Task, you can click here for the instructions.
Table of Contents
- Prerequisites & Outline
- How to Create a Psychomotor Vigilance Task with PsychoPy
- Download Psychomotor Vigilance Test (PVT) Created in PsychoPy
- Conclusion
- References
Prerequisites & Outline
To follow this PsychoPy tutorial, you need to have an installed version of PsychoPy and some minimal knowledge of Python language (if you want to customize your experiment a bit). To download and find instructions on how to install PsychoPy, click here. In this post, we will create the Psychomotor vigilance task using PsychoPy. We will go through how to create routines, add text stimuli, keyboard responses, and custom Python code, among other things.
How to Create a Psychomotor Vigilance Task with PsychoPy
In this section, we will start by opening the PsychoPy application and then build the Psychomotor vigilance test step-by-step. In this post, we use the PsychoPy 2022.1.4 version:
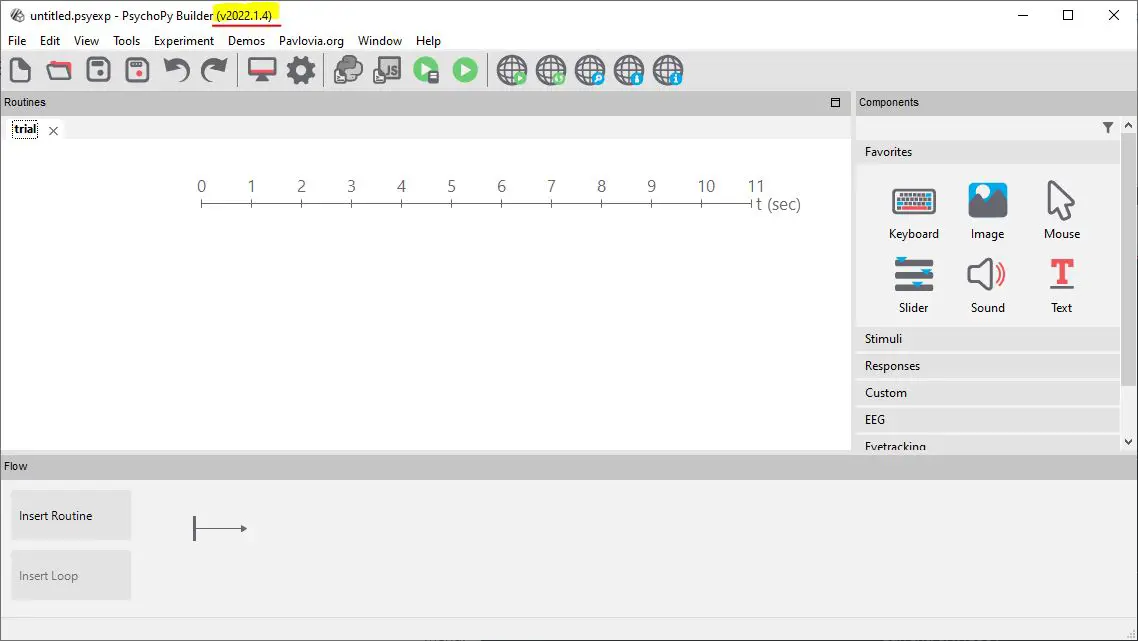
Creating the Task Instructions for the Psychomotor Vigilance Test
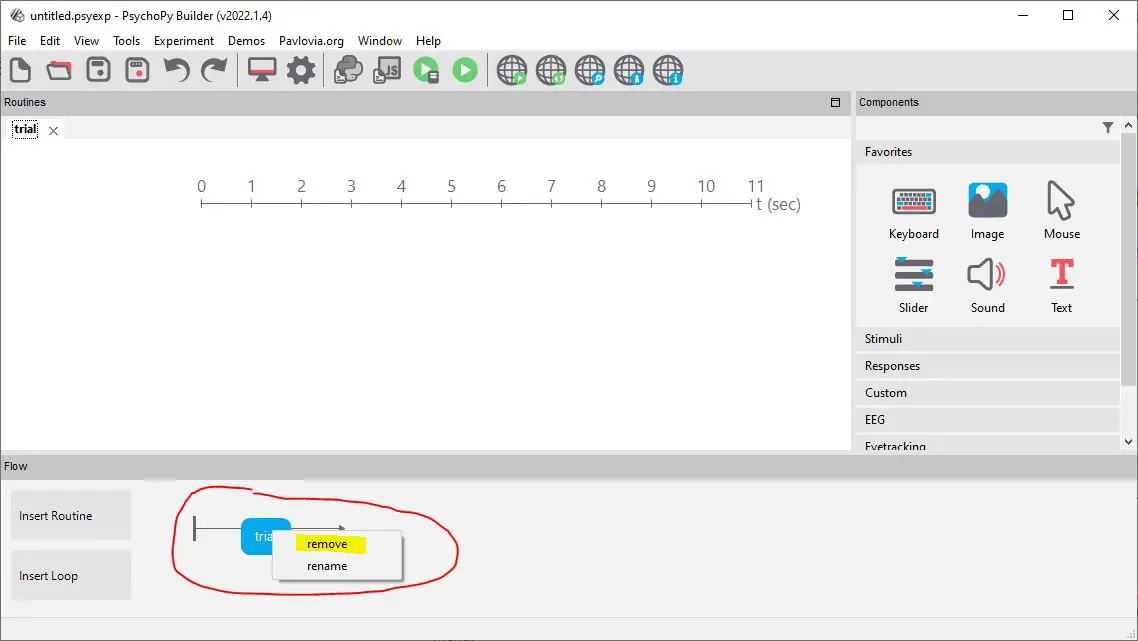
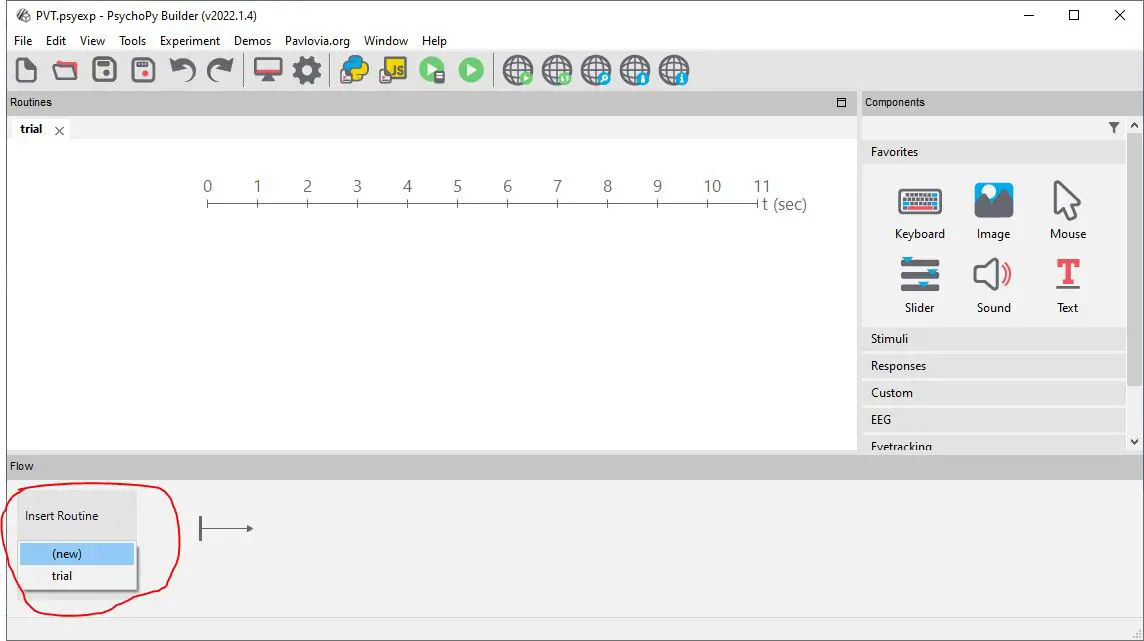
First, when we start PsychoPy, we get a routine called “trial” (see image above). Here we will remove this routine and save the “untitled.psyexp” as PVT. To remove the trial routine, we right-clicked on it and chose “remove” from the dropdown menu:
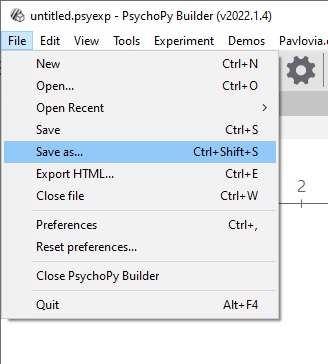
The next thing to do is to save the experiment and (at the same time) give it a name. Experiments in PsychoPy can be saved by clicking on “File” and then “Save as…”:
In this PsychoPy tutorial, we are creating a psychomotor vigilance test to save the experiment as “PVT.psyexp.” Note that this will also give the experiment the name “PVT.” However, you can change the name of the experiment in the experiment settings:
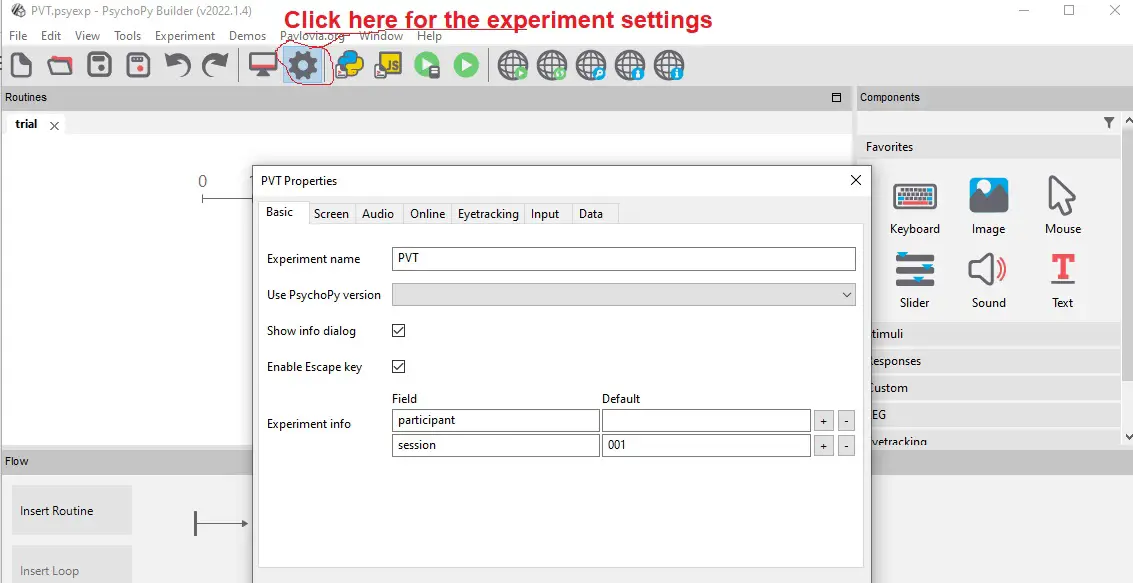
For now, we will leave the name as it is, but we will have a look at the experiment settings later in the post. In the next section, we will start building the test in PsychoPy by adding a welcome screen containing the task instructions.
Creating the first routine: Instructions
This subsection will create our first routine containing the task instructions. First, we click on “Insert Routine” in the left corner of PsychoPy:
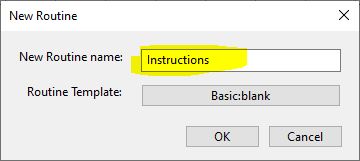
After clicking on “(new),” a dialogue pop-up. Here we name the new routine “Instructions” and press “OK”:
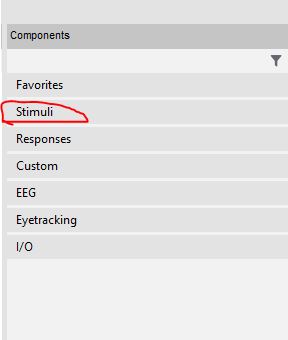
Now that we have our Routine, we will add two components: Text and Keyboard. We can find PsychoPy components at the right of the Routines. We are going to start adding the instructions in a Text component found under Stimuli:
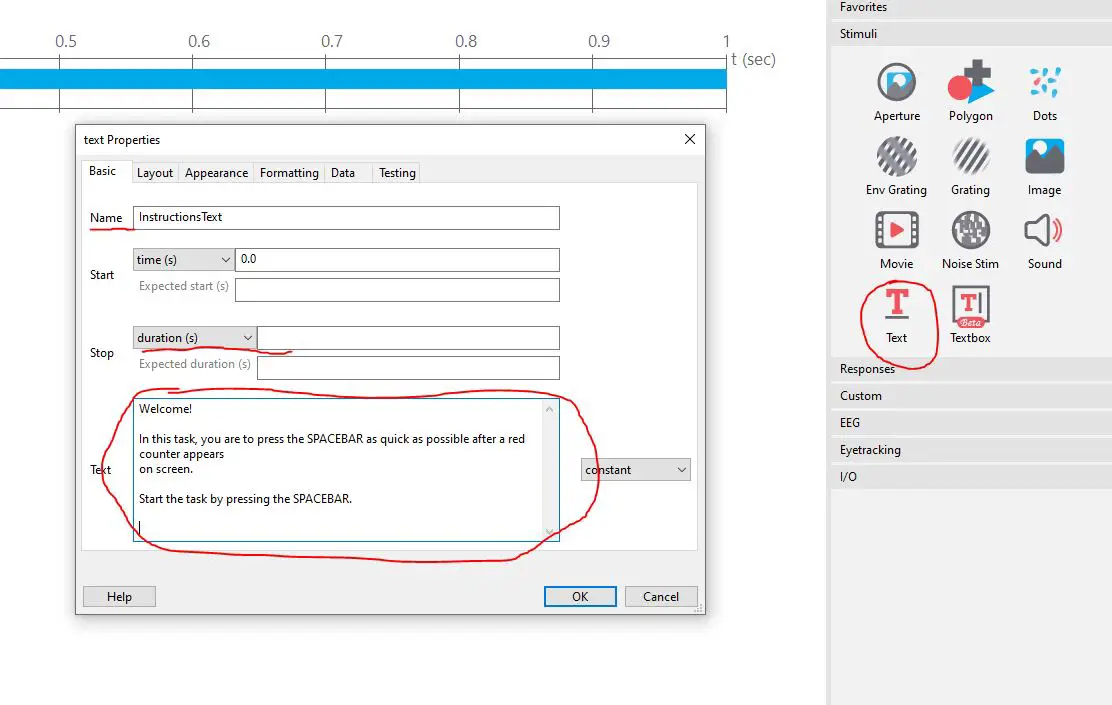
We will not add and change much to this Text component in this tutorial. We will add it, change the name to “InstructionsText,” and remove the duration (we will leave it blank). Finally, we are adding the text of this instruction:
Instructions
Welcome!
In this task, you are to press the SPACEBAR as quick as possible after a red counter appears
on screen.
Start the task by pressing the SPACEBAR.
We now have some task instructions, but as you can see at the end of the instructions, we tell the participants to press the spacebar to start the task. This means that we need to add a keyboard component. Again, we can find the component we want to the right in the PsychoPy builder (under “Responses”):
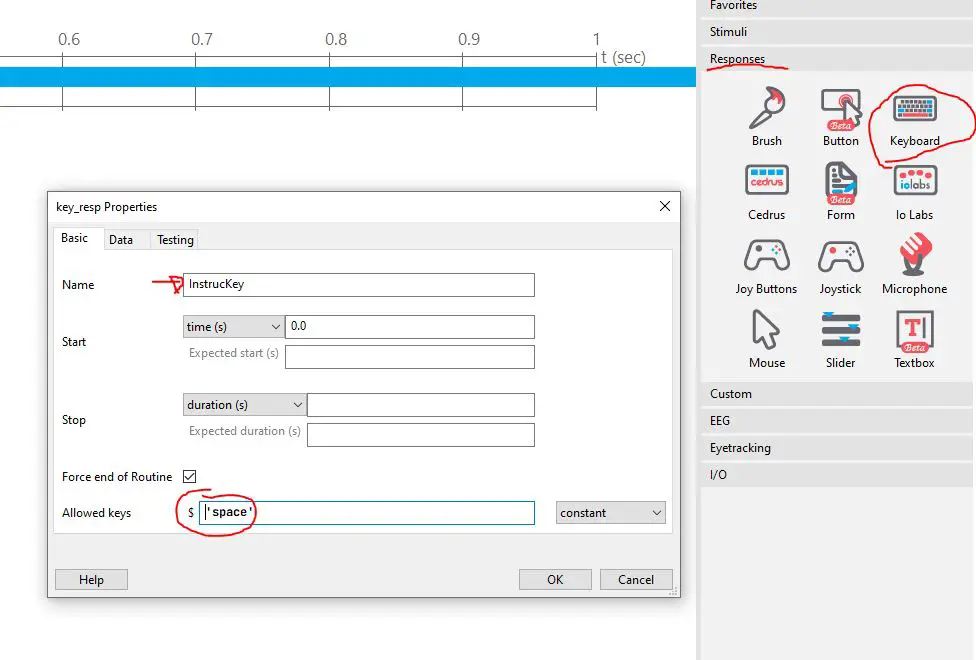
As you can see in the image above, we named the Keyboard component “InstrucKey” and removed all but ‘space’. In the next section, we are ready to start creating the task.
Interstimulus Interval
The next thing we will do is fix the interstimulus interval (ISI). Here we are going to create our first custom code. First, we create a PsychoPy routine and name it “ISI.” Second, we find our way to the code component. Again, we can find it right in the PsychoPy Builder GUI under “Custom.” We name this routine “ISIcode.” As you probably can see now, there are many different tabs. In this part of the tutorial, we are going to add code to the “Begin Experiment”, “Begin Routine”, and “Each Frame”. Here is an image showing everything:
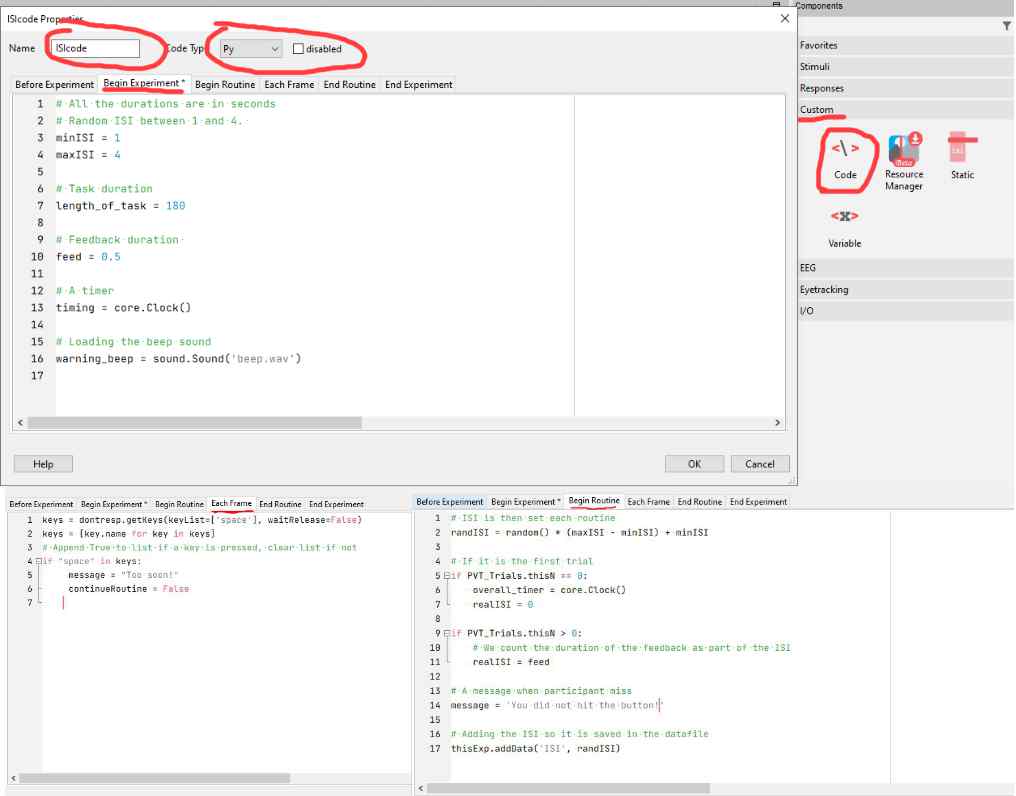
Do not worry; we will get into more detail than this (also, you can download the Psychomotor vigilance task towards the end of the post to look). In the first tab (“Being Experiment”), we will add some of the settings of the Psychomotor vigilance test: the ISI, the task’s duration, and the task’s duration. We could have added this to a code component in a previous routine, but we had no use for other code segments then. Here is the code we add:
# All the durations are in seconds
# Random ISI between 1 and 4.
minISI = 1
maxISI = 4

# Task duration
length_of_task = 180

# Feedback duration
feed = 0.5

# A timer
timing = core.Clock()

# Loading the beep sound
warning_beep = sound.Sound('beep.wav')
Code language: Python (python)
Note that all durations are in seconds so this psychomotor vigilance task might be rather short (i.e., 3 minutes), and you can change this for your own needs. Hopefully, the variable names are self-explanatory (with the comments in the code), but it is the ISI, feedback duration, and task. The last two variables are not used in this particular routine, but we will use a warning sound (a beep) that will be played when not responding (the timer is used for this as well). In the next tab (“Begin Routine”), we will add code that is changed every time this routine starts:
# ISI is then set each routine
randISI = random() * (maxISI - minISI) + minISI

# If it is the first trial
if PVT_Trials.thisN == 0:
    overall_timer = core.Clock()
    realISI = 0

if PVT_Trials.thisN > 0:
    # We count the duration of the feedback as part of the ISI
    realISI = feed

# A message when participant miss
message = 'You did not hit the button!'

# Adding the ISI so it is saved in the datafile
thisExp.addData('ISI', randISI)Code language: Python (python)
In the code above, we first calculate the random ISI for each trial (i.e., each routine). On lines 5 – 7, we set a timer and a variable to 0. Now, we will use this variable (on line 7) later, but from the second trial to the last one, we subtract the feedback duration from the random ISI. This way, we include the feedback in the ISI. Lines 5 – 11 can be removed if you do not want to count the feedback duration into the ISI. Finally, we will also add code that will be run constantly (i.e., updated).
keys = dontrespond.getKeys(keyList=['space'], waitRelease=False)
keys = [key.name for key in keys]

# Append True to list if a key is pressed, clear list if not
if "space" in keys:
     message = "Too soon!"
     continueRoutine = False
Code language: Python (python)
The code above ensures that reaction time will not be recorded when the participants are too quick (e.g., taking a chance), and they will receive feedback telling them they were too fast! The next thing to do is to add a text component (just a blank screen, basically):
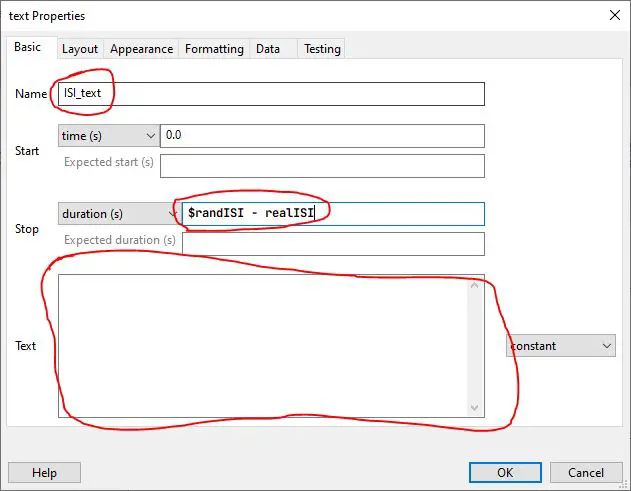
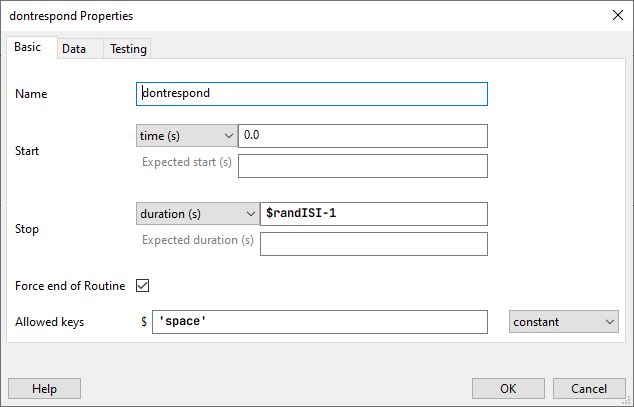
In this text component, we use some of the variables we previously created in the code component. Here we use the random ISI, but we subtract the feedback time. Also, notice how we left the Text blank. Now there is one final thing we need to add to make the ISI routine complete: a keyboard response:
Adding the Target to the Psychomotor Vigilance Task
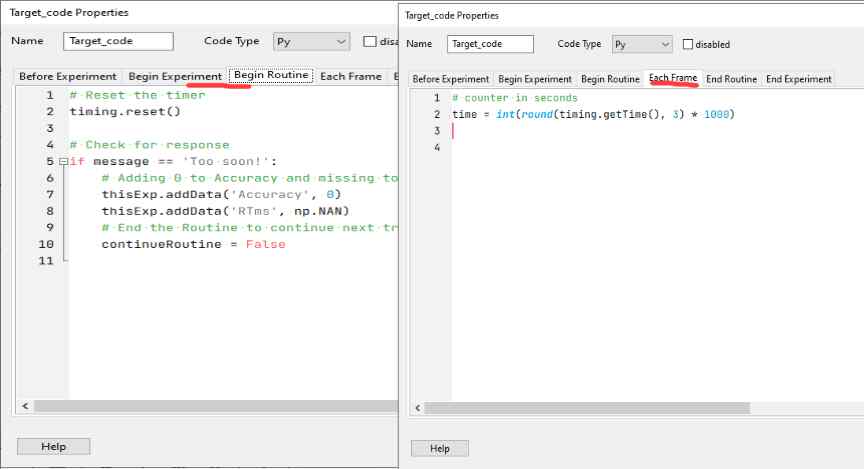
In this subsection, we will add a routine containing the target (i.e., the counter in the Psychomotor vigilance test). When we have created our new routine (called “Target”), we will add 1) custom code, 2) text stimuli, and 3) a keyboard. Here is the code we add (Begin Routine tab):
# Reset the timer
timing.reset()

# Check for response
if message == 'Too soon!':
    # Adding 0 to Accuracy and missing to RTms
    thisExp.addData('Accuracy', 0)
    thisExp.addData('RTms', np.NAN)
    # End the Routine to continue next trial
    continueRoutine = False
Code language: PHP (php)
First, we reset the timer we previously created so that the participants get 30 seconds to respond from the target onset. Second, we checked whether there was a response. In this if-statement, we also add some data. We will also add one line of code in the “Each Frame” tab: time = int(round(timing.getTime(), 3) * 1000).
To enable the feedback (see next section) to be the actual reaction time, we also need to add code to the “End Routine” tab. In the code chunk below, we make sure that the Response.rt is float (which is if we got a response). We then change the message to the reaction time and add accuracy and reaction time in milliseconds to the data. In the last if-statement, we make sure that the feedback is changed to “No response”! And we, again, add data to the file as well as play a warning sound.
if type(Response.rt) is float:
    message = str(round(Response.rt * 1000))
    thisExp.addData('Accuracy', 1)
    thisExp.addData('RTms', Response.rt * 1000)

# PsychoPy is not running the trial for more than 29.991...
if timing.getTime() >= 29.99:
        message = 'No response!'
        warning_beep.play()
        Response.rt = timing.getTime()
        thisExp.addData('RTms', np.NAN)
        thisExp.addData('Accuracy', 0)
        continueRoutine = FalseCode language: PHP (php)
Next up is to add the target stimuli:
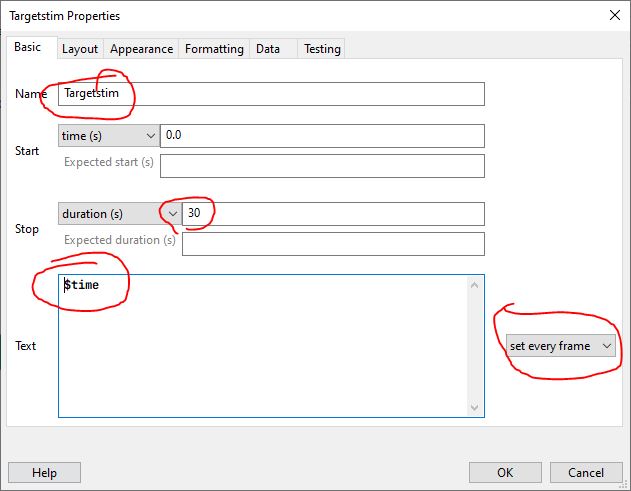
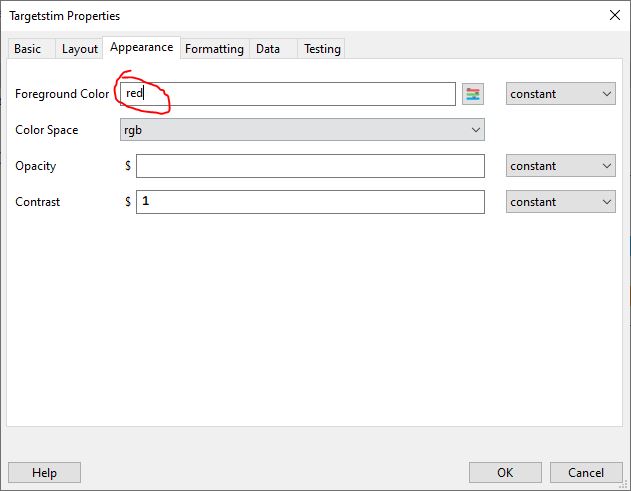
We added $time in the Text field but changed from “constant” to “set every frame.” This is because this variable will be the time counting (i.e., the target). Here we will also change the color of the counter to red by clicking on the Appearance tab. We change the Foreground Color to red:
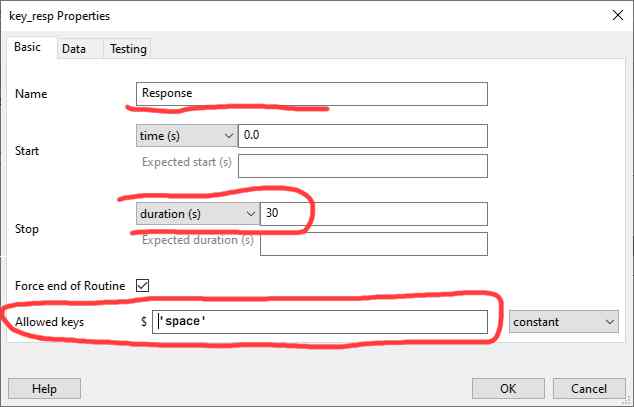
The next thing to do is to add a keyboard component to collect the responses:
In the next section, we will create a routine for displaying feedback.
Feedback
In this short subsection, we will learn how to add feedback to the Psychomotor vigilance task. We do this by creating a new routine and adding a text component to it:
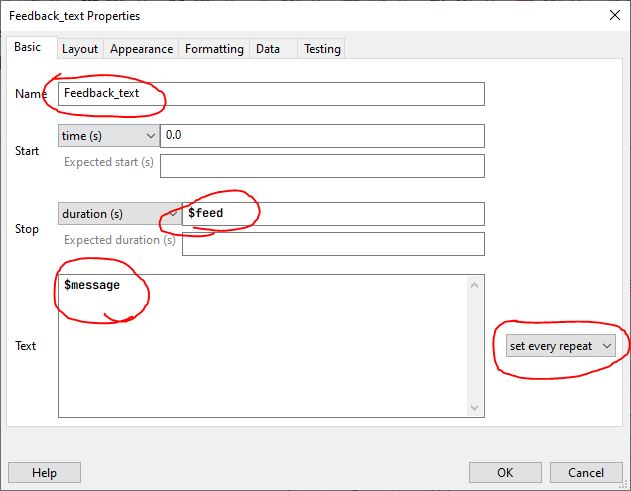
Notice how we only add variables to this component and change it to set every repeat (the message needs to change each time this routine is run). Remember the previous code chunks? The feedback duration is set earlier in the PsychoPy tutorial, and the message is either the reaction time, that they responded too soon, or that they did not respond. If you want the feedback to be displayed in red, change it in the Appearance tab. In the next subsection, we will add a loop, a new routine we call “End_task” and a routine for displaying text notifying that the task is done.
Creating a Loop and Finalizing the Experiment
In this subsection, we start by adding the routine we call “End_task” which will only contain a couple of lines of Python code:
# Get the time in the task
time_in_task = overall_timer.getTime()
# If time_in_task corresponds to the duration we set previously we end te task
if time_in_task >= length_of_task:
continueRoutine = False
PVT_Trials.finished = True
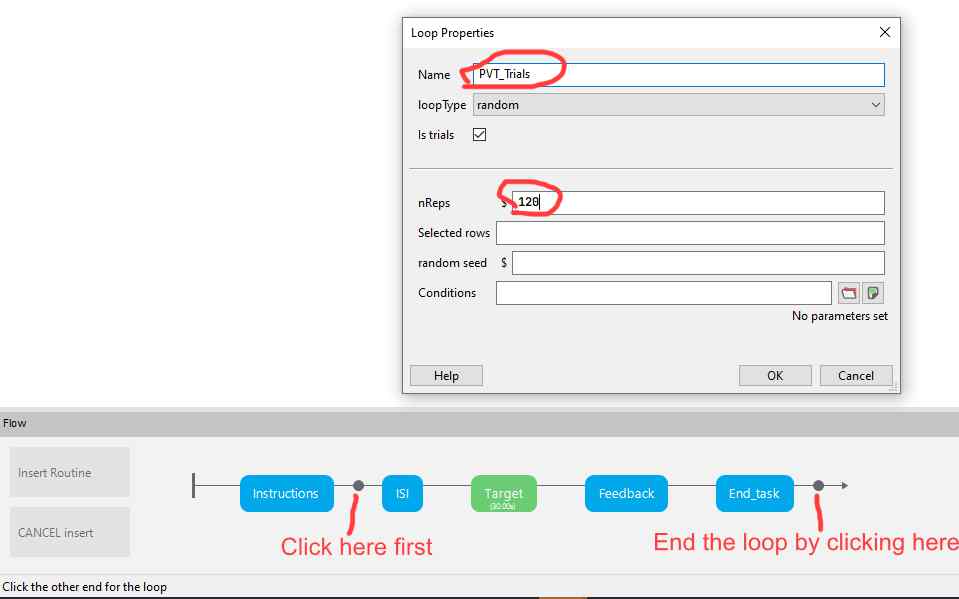
Code language: PHP (php)Note that the last line (7) uses something we have not created: the trials loop. Here is how we create this loop (now, we must name it “PVT_Trials”). First, we click on “insert loop.”
Next. we will add the loop by 1) clicking on the flow between “Instructions” and “ISI.” The loop should end after “End_task,” so next, we click there. We add 120 repetitions because the experiment will end after a certain number of minutes. Again remember to give this loop the name “PVT_Trials”:
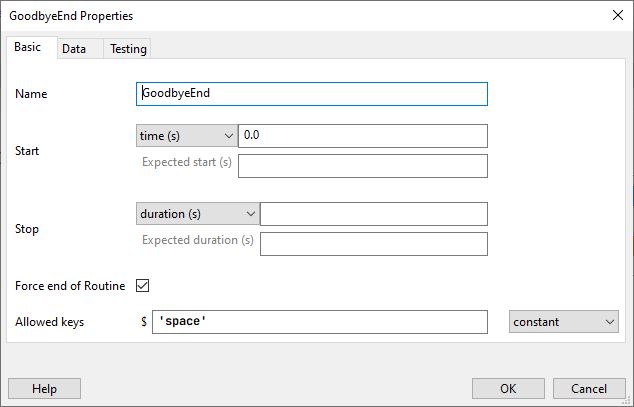
We now have one final thing to do before we can pilot the task! We are going to add one last routine containing a text stimulus (with some text notifying the participants that the task is done) and a keyboard component to end the task:
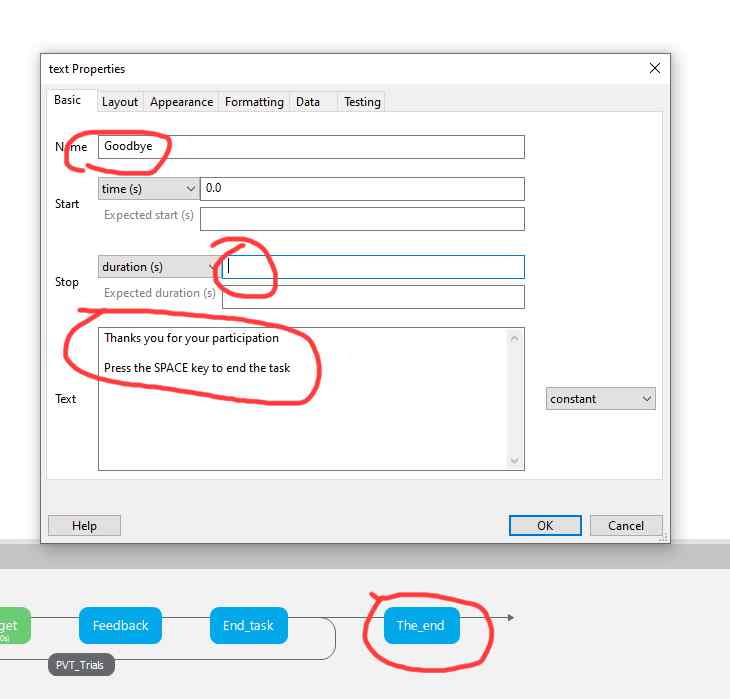
Concerning the keyboard component, there is nothing special, but we give it a name, remove all keys except for space, and make sure that there is no duration:
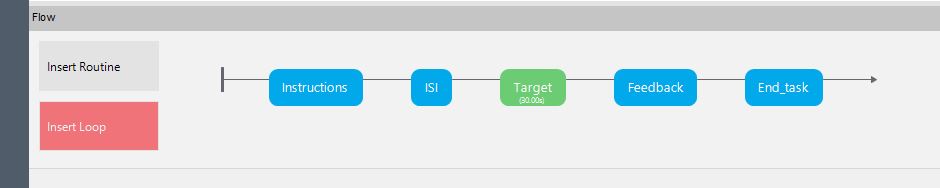
Now you should have a running psychomotor task created with PsychoPy. Here is what your Flow should look like:

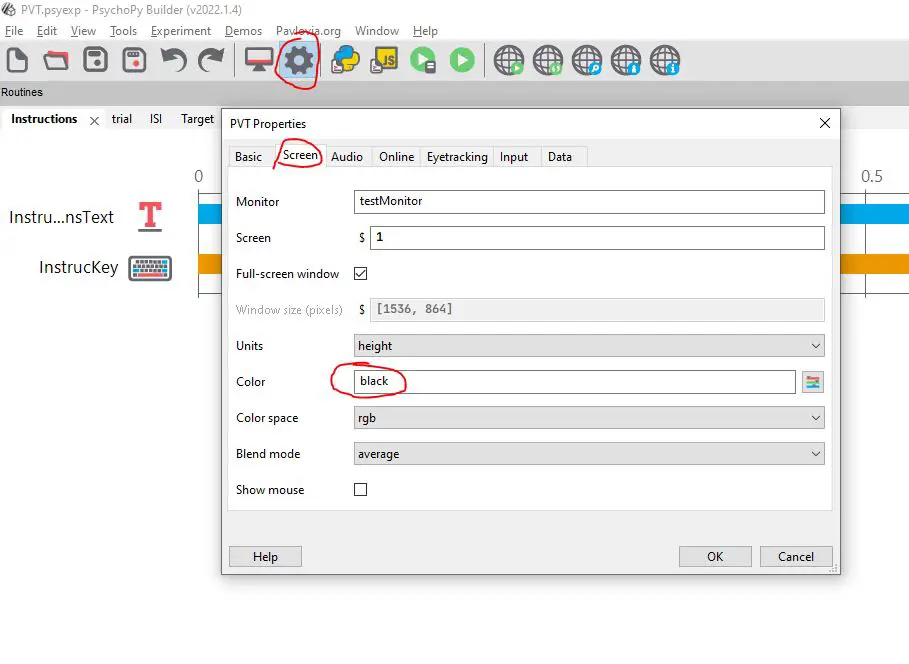
Changing the Background Color in PsychoPy
One last thing we can do is to change the background color to black (or any color we would like) in the Experiment settings:
Now you should have a running psychomotor vigilance task. Ensure your pilot test and check whether the data looks okay in the file. If you want to learn how to handle data (in general), there are some posts here:
- Pandas Read CSV Tutorial: How to Read and Write
- Create a Correlation Matrix in Python with NumPy and Pandas
- Pandas Count Occurrences in Column – i.e. Unique Values
- Repeated Measures ANOVA in Python using Statsmodels
Download Psychomotor Vigilance Test (PVT) Created in PsychoPy
The Psychomotor Vigilance Test created in this Psychopy Tutorial can be downloaded from this GitHub page. Most of the experimental tasks I create are published under a CC-BY license, so make sure you give me credit. For example, it would be preferable to use this blog post in the reference. More information about this can be found in README. Finally, if you have any problems with this file – please open an issue on GitHub.
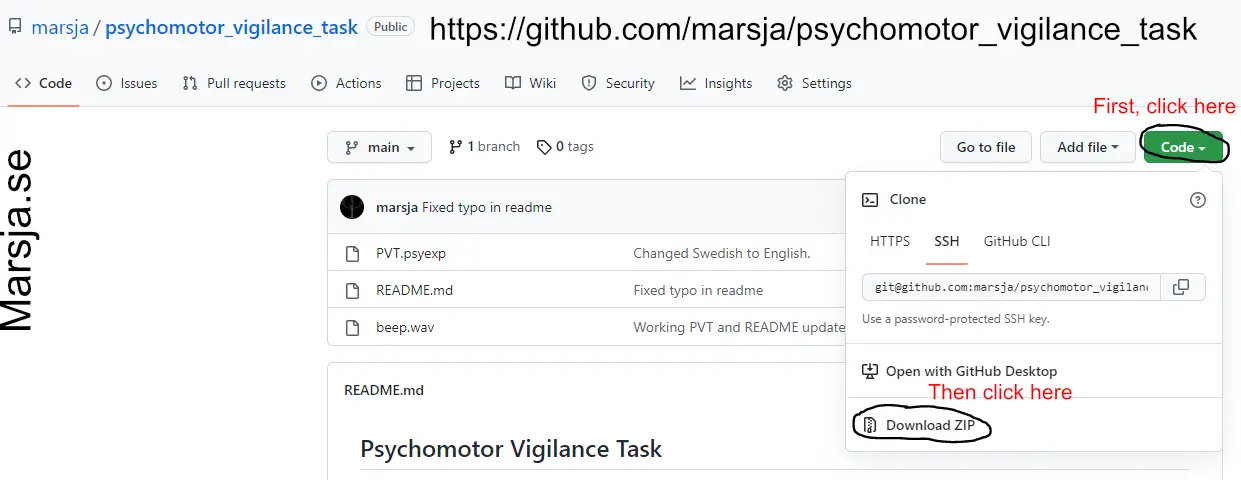
If you are familiar with git and GitHub, it is possible to clone the repository to download the psychomotor vigilance task.
Conclusion
Note that the task was created using PsychoPy 2022.1.4. Although I will try to update the post from time to time when new versions of PsychoPy are released, I would appreciate it if you let me know of any problems. Finally, if you appreciate my posts, please donate here or here.
References
Loh, S., Lamond, N., Dorrian, J., Roach, G., & Dawson, D. (2004). The validity of psychomotor vigilance tasks of less than 10-minute duration. Behavior Research Methods, Instruments, & Computers, 36(2), 339–346. https://doi.org/10.3758/BF03195580
Wilkinson, R. T., & Houghton, D. (1982). Field test of arousal: a portable reaction timer with data storage. Human factors, 24(4), 487-493.