In this OpenSesame tutorial,l we will learn how to use images as stimuli and how to load the trials, including filenames, correct responses, and conditions, from a pre-generated CSV file. To follow this tutorial, you don’t need to know Python programming. However, we will generate the CSV file using a short Python script. This can be done manually, of course. See also this OpenSesame tutorial. See also the PsychoPy tutorial on how to make a Psychomotor Vigilance task.
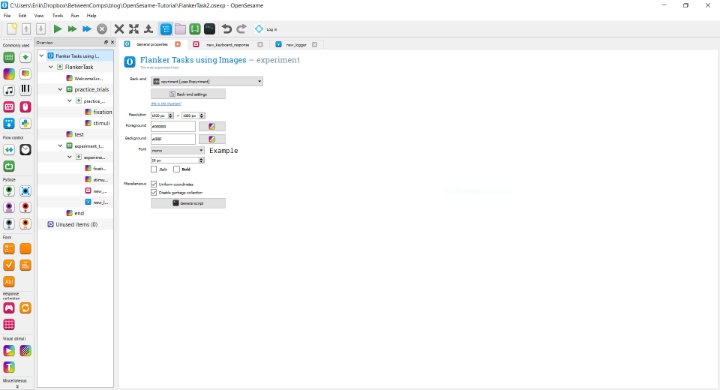
Table of Contents
- Creating a Flanker Task with Image Stimuli using OpenSesame
- How to Create a Flanker Task using OpenSesame
Creating a Flanker Task with Image Stimuli using OpenSesame
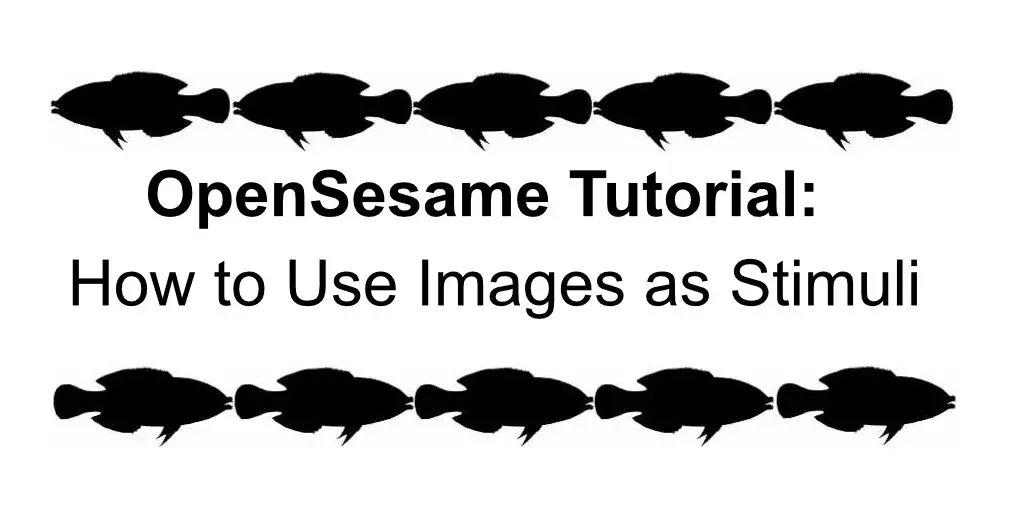
As in the previous tutorial, we will create a version of the Flanker Task. In this version, the task is to respond, as quickly and correctly as possible, to the direction a fish is swimming. There are two conditions. First, in the congruent condition, the fish will be surrounded by other fishes swimming in the same direction (e.g., all fishes swimming to the right).

Second, in the incongruent condition, the surrounding fishes will swim in the opposite direction. Note, regardless of the condition, the fish may be swimming to the right or left.

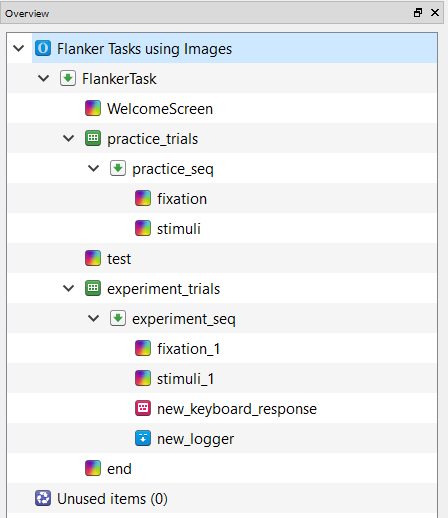
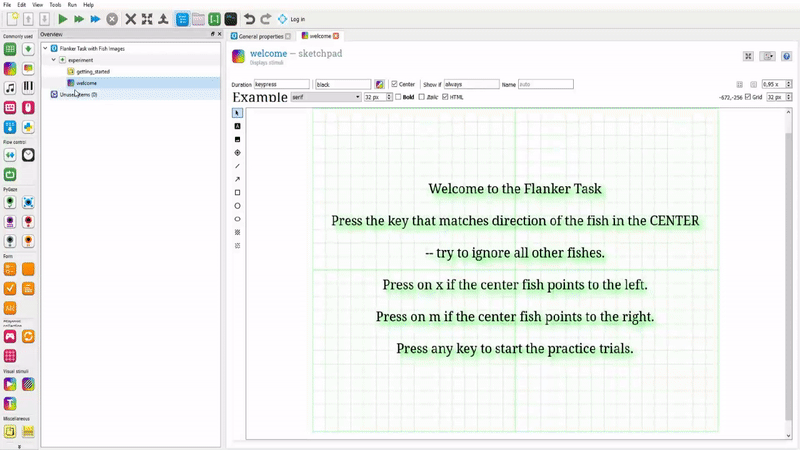
In the OpenSesame experiment we will create here, there will be four practice trials and 64 test trials. Each trial, whether practice or test, will start with the presentation of a fixation dot for 2000ms. After the fixation dot, an image will be presented (also for 2000ms). The last layout in OpenSesame can be seen in the figure below.
How to Create a Flanker Task using OpenSesame
Depending on your needs, five templates can be used when creating an experiment using OpenSesame. This tutorial will use the “Default template” by clicking on File and then New.
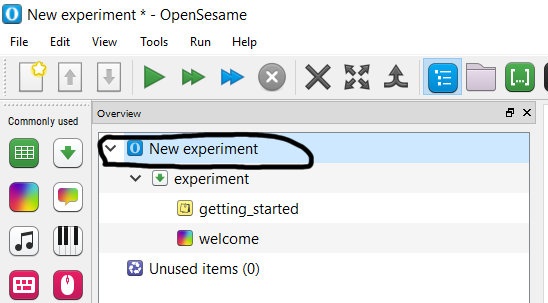
Now we are ready to start building our experiment! The first thing that we should do is click on New Experiment:
Changing the background color
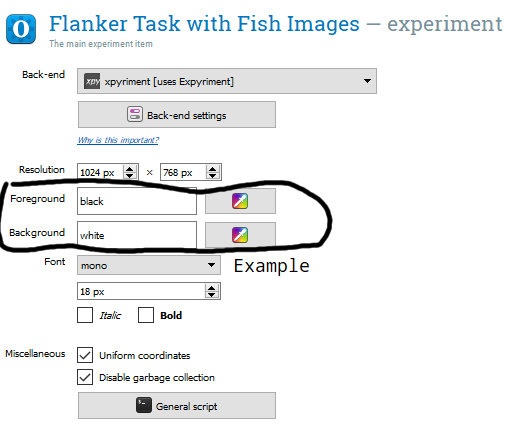
When creating experiments using OpenSesame’s default template the resulting experiment will have a black background and all text will be in white. As you may have noticed, the fish stimuli are black on white background. Thus, we need to change the background and foreground to white and black, respectively. This is done in the New Experiment tab and we just need to change “white” to “black” (Foreground) and “black” to “white” (Background):
Notice that in the image above, “New Experiment” is renamed “Flanker Task with Fish Images”. This is also easy to do; double-click on the text (“New Experiment”) and type something else. There are also other settings that can be changed here, e.g., resolution, font, and font size. Before we continue, it can be good the get an overview of the OpenSesame objects that we are going to use in this tutorial:
Instructions
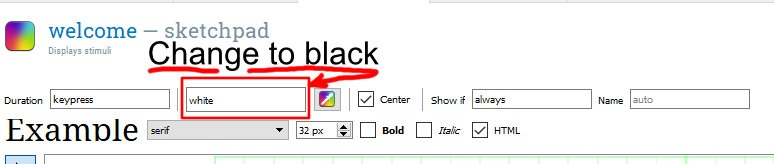
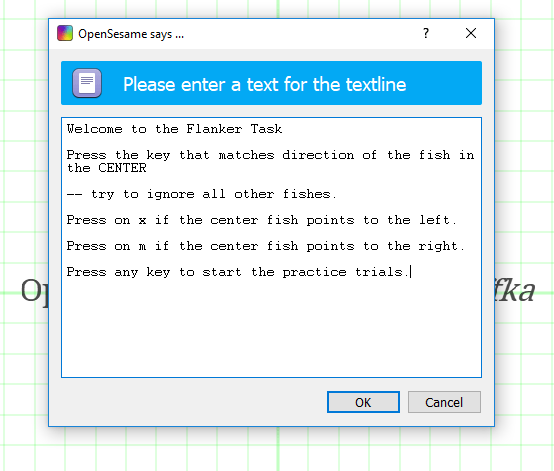
The next thing we need to do is create the instructions for the task. We can use the sketchpad “welcome” for this – click it. OpenSesame’s default template already has some text in this sketchpad. Notice how we cannot read it; the text is in white on a white background! Move the mouse cursor to the middle of the grid and click. We are now able to change the color from white to black:
To add task instructions, double-click on “OpenSesame 3.2 Kafkaesque Koffka” (or whatever text the version of OpenSesame we run has) and add the instructions text in the pop-up:
How to Create Practice Trials
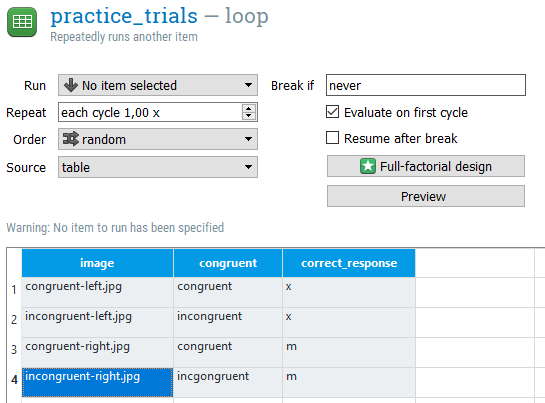
We continue this OpenSesame tutorial with the first loop for our practice trials. This is done by dragging and dropping the loop object under the welcome sketchpad. We call it “practice_trials” by clicking on the new_loop (blue text).
In our case, we add four trials and name the columns, image, congruent, and correct_response. Furthermore, in the image column, we put the four different images that we are going to use (“congruent-left.jpg“, “incongruent-left.jpg”, “congruent-right.jpg”, and “incongruent-right.jpg“). Continuing with the task, in the column congruent we type in “congruent” . Remember to match the filenames. Finally, we add the correct response in the last column (“x” for when the middle fish is swimming left and “m” for when it is swimming to the right).
Creating a Sequence
We will continue this tutorial by creating something called sequence. Items in a sequence are executed sequentially and is used to place the fixation dots/crosses and stimuli (e.g., images, text). The sequence is going to be placed in our practice_trials loop. We will name it practice_seq, and here we will add the fixation dot and flanker stimuli.
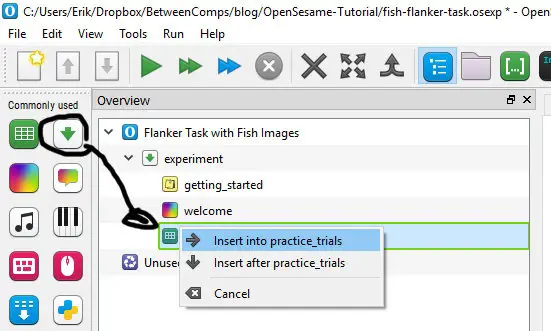
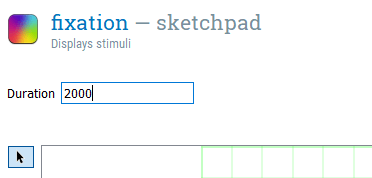
Now when we have inserted a sequence, we will name it “practice_seq” and drag two sketchpads to it. The first sketchpad is going to contain the fixation dot, and we drag it, exactly like the sequence object and drop it into the practice sequence. Now when we have the fixation dot sketchpad, we rename it “fixation”, and add a duration of 2000ms:
We continue the OpenSesame tutorial by adding a fixation dot to the sketchpad. This is very easy; we just click on the icon that looks like a crosshair on the left of the grid and then click with the pen in the middle of the grid.
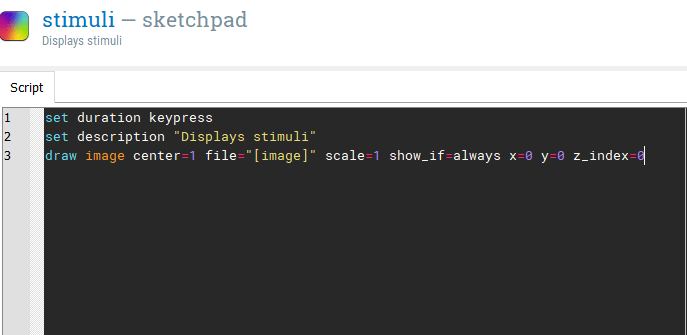
The next step is to add a sketchpad for presenting the stimuli. It’s in this sketchpad we are going to present the images of fish swimming to the left or right. We just add it as we added the fixation dot sketchpad and rename it “stimuli”. Now, this sketchpad is going to be “empty,” and all we are going to do is use this line of code:
draw image center=1 file="[image]" scale=1 show_if=always x=0 y=0 z_index=0
The code above will draw an image from the column in the practice_trials loop in the middle of the screen. To add the line of code, we have to click on the Select View drop-down in the right upper corner of the sketchpad (next to the question mark icon). From the drop-down menu, we will select View Script and add the code on the third line:
Make sure that you also change the duration for the sketchpad to 2000! Now we have created the practice trials. Usually, we would want to tell the participants that the practice part is over and that the test part will start. Let’s add a sketchpad after the practice loop and name it “end_practice”. Here we’ll add a textline object with the text: “That was the practice trials. Press ANY key to continue.”
Creating Trials from a File
In this section, we are going to create the test trials, and, as previously mentioned, we will have 64 test trials. Instead of creating the table by hand, we can load the information of trials from a file. Furthermore, we don’t have to drag and drop everything again but can copy the previous loop (practice_loop) and make the changes we need to it. Let’s start by copying the loop:
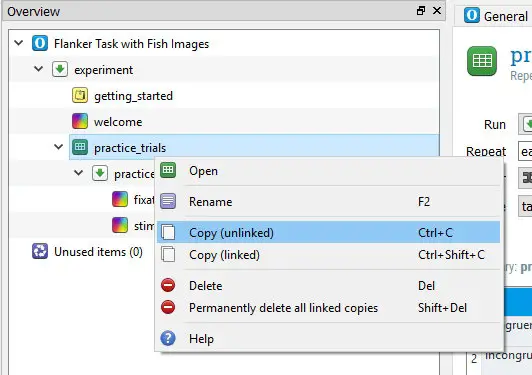
Now we can right-click again (or press ctrl-V) and choose to paste our copied loop, including the sequences and sketches, after the practice trials. Before we add the keyboard response and the logger, we rename the new loop to “experiment_loop” and the new sequence to “experiment_seq”.
Creating Trials using Python
In this sub-section, we are going to use some coding, and can be skipped if you want to create the file by hand. To be able to run this code, we need to have Python and Pandas installed (tip: install Anaconda Python distribution to get both). In the first code chunk, we import pandas as pd as well as shuffle from random. Next, we create a list of Python dictionaries. Notice that the keys are the filenames and the values are the correct responses.
import pandas as pd
from random import shuffle

filenames = [{'congruent-left.jpg':'x'}, {'incongruent-left.jpg':'x'},
        {'congruent-right.jpg':'m'}, {'incongruent-right.jpg':'m'}]
Next, we set the number of trials (n_trials) and create the total amount of trials (total_trials). This is done by multiplying each object in the list filenames by the number each stimulus will be shown (in this case, 16). In the last row, we are going to shuffle (randomize) the list,
n_trials = 64

total_trials = filenames*int(n_trials/len(filenames))
shuffle(filenames)
In the final code chunk, we are creating a new dictionary (trials). This dictionary will contain all information needed for OpenSesame to run our Flanker task. In the following for loop, we get the first key from each dictionary in the list of total_trials. This variable will contain the image name for each trial.
After this, we will get the condition (congruent or incongruent) by splitting the string and taking the first item in the resulting list (image.split…). We continue by getting the correct response using the image as key. Next, we append everything to the lists in the dictionary (i.e., trials), Finally, we create a dataframe and then use to_csv to save the file.
trials = {'image':[], 'condition':[], 'correct_response':[]}

for trial in total_trials:

    # Getting the first key from the dictionary
    image = next(iter(trial.items()))[0]

    # Creating the condition
    condition = image.split('-')[0]
    correct_resp = trial[image]

    trials['image'].append(image)
    trials['condition'].append(condition)
    trials['correct_response'].append(correct_resp)

trials_df = pd.DataFrame(trials)
trials_df.to_csv('f_trials.csv', index=False)
Learn more about using Pandas:
Adding the Trials from the File
Now that we have the file “f_trials.csv” we can use it in the test loop. Change from “table” to “file” in the drop-down menu (Source):
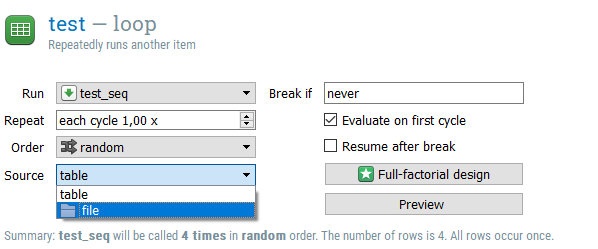
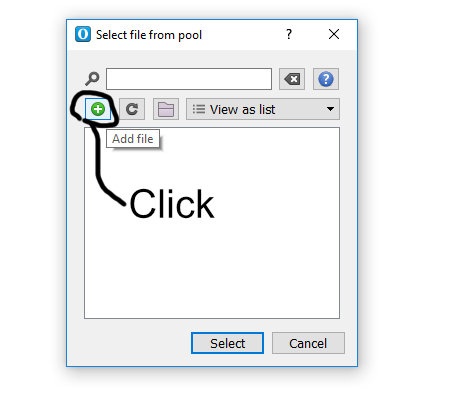
Click Browse and the green and white plus symbol to add your file. After adding the file, make sure you select it!
Recording Responses using OpenSesame
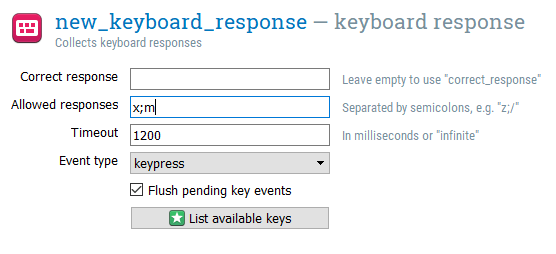
In this section of the OpenSesame tutorial, we are going to learn how to record responses. Additionally, in the flanker task, we are creating, we will let the participants use the keyboard. As with everything else, we drag and drop the keyboard response object into our test_seq sequence. Here we add “x;m” in Allowed responses (without the “”) and “1200” in Timeout.
Finally, to get responses recorded, we will add a logger by dragging and dropping the object into the test_seq sequence. There’s one last thing we should do; add a sketchpad after the test. Drag and drop a sketchpad object to the test loop and choose after the test. In this sketchpad, we’ll add the text “Thanks for participating”.
Here’s the video showing the practice trials: